You are viewing an old version of this page. View the current version.
Compare with Current
View Page History
« Previous
Version 8
Next »
These instructions will help you add a Facebook feed to your department website.
Note: If you have begun the authorization process and abandon the process part-way through or you encounter an issue, you will need to open an online help request to have the system cleared so that you can try again.
Do This First!Important: Before beginning this process, please make sure you are logged out of your social media completely. If you omit this step, you will authorize your own social media account rather than your department's social media account and your personal content will display on your USD website. - Go to the Facebook site.
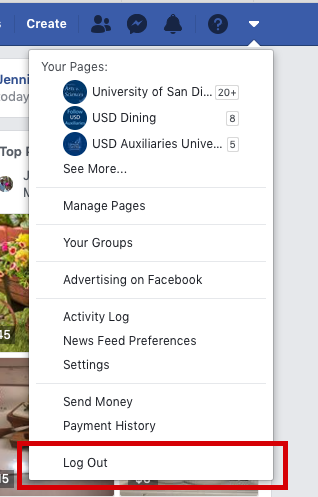
- Click on the arrow on the far right of the global bar.
- Click on "Log Out".
| 
|
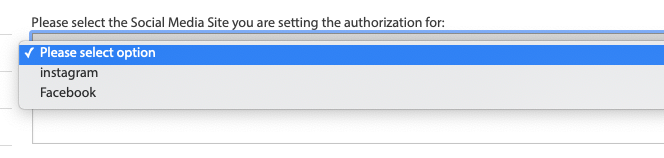
Start Authorization for Social Connection Display- In your browser, go to: Social Media Authorization. If needed, log in through the portal first with your USDOne account.
- From the drop-down "Please select the Social Media Site" select Facebook.
- Enter your Facebook username in the text box labeled "Please provide the username of the Social Media account that will be granting access."
- Click on Submit.
| |
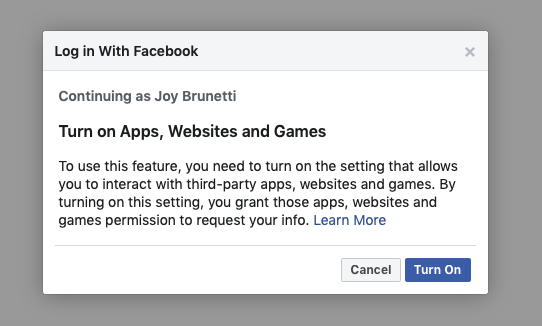
Turn on Facebook Apps, Websites and Games Setting- Once you click on submit, you will be redirected to the Facebook website. Please login with the username that you entered in #3 above.
- You will be prompted to turn on Apps, Websites and Games. Click the "Turn On" button to activate.
|  |
Authorize the Social Connection Display - You will be prompted to continue the process as the username you entered in the previous step. Click "Continue as [ user ]" to proceed.
- After logging in, authorize the app access by clicking on "Authorize".
|  |
- You will be returned to www.sandiego.edu where you will be presented with a page that looks like the image on the right.
- Copy this information and paste it somewhere secure. You will need this information in the next step.
| |
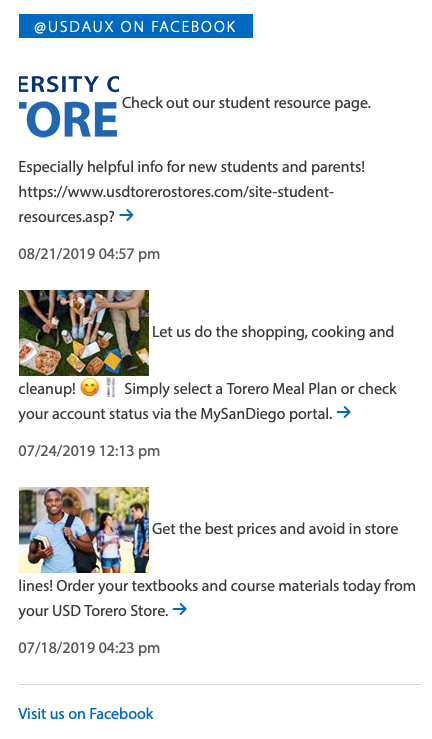
Facebook Display OptionYour Facebook content will display as a list on your site. This is displayed to the right. | |
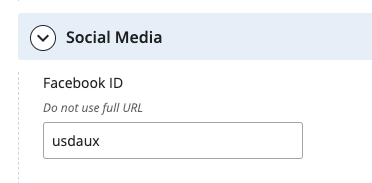
Cascade Steps - Site SettingsIn Cascade, you will need to tell your site which social media account you've authorized for use on your site. To do this: - Edit your site-settings file.
- Look for the Social Media area.
- Input the Facebook username (the username you entered in #3 in start Authorization).
- Click on Save.
- Click on Submit.
| |
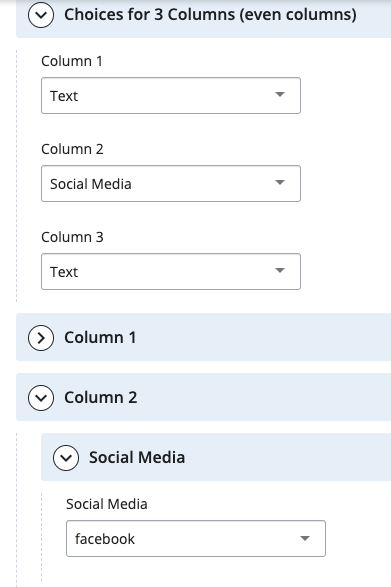
Cascade Steps - PageIn Cascade, you will also need to set a page up to display this social media. Your feed can go on any page of your website. When you decide on a page, go to the page in Cascade and do the following: - Click Edit.
- Select the column where you would like to place your feed and set it to Social Media.
- In the column drop-down, set the social media dropdown to Facebook.
- Click on Save.
- Click on Submit.
| |