Workflow Approval Process
Table of Contents
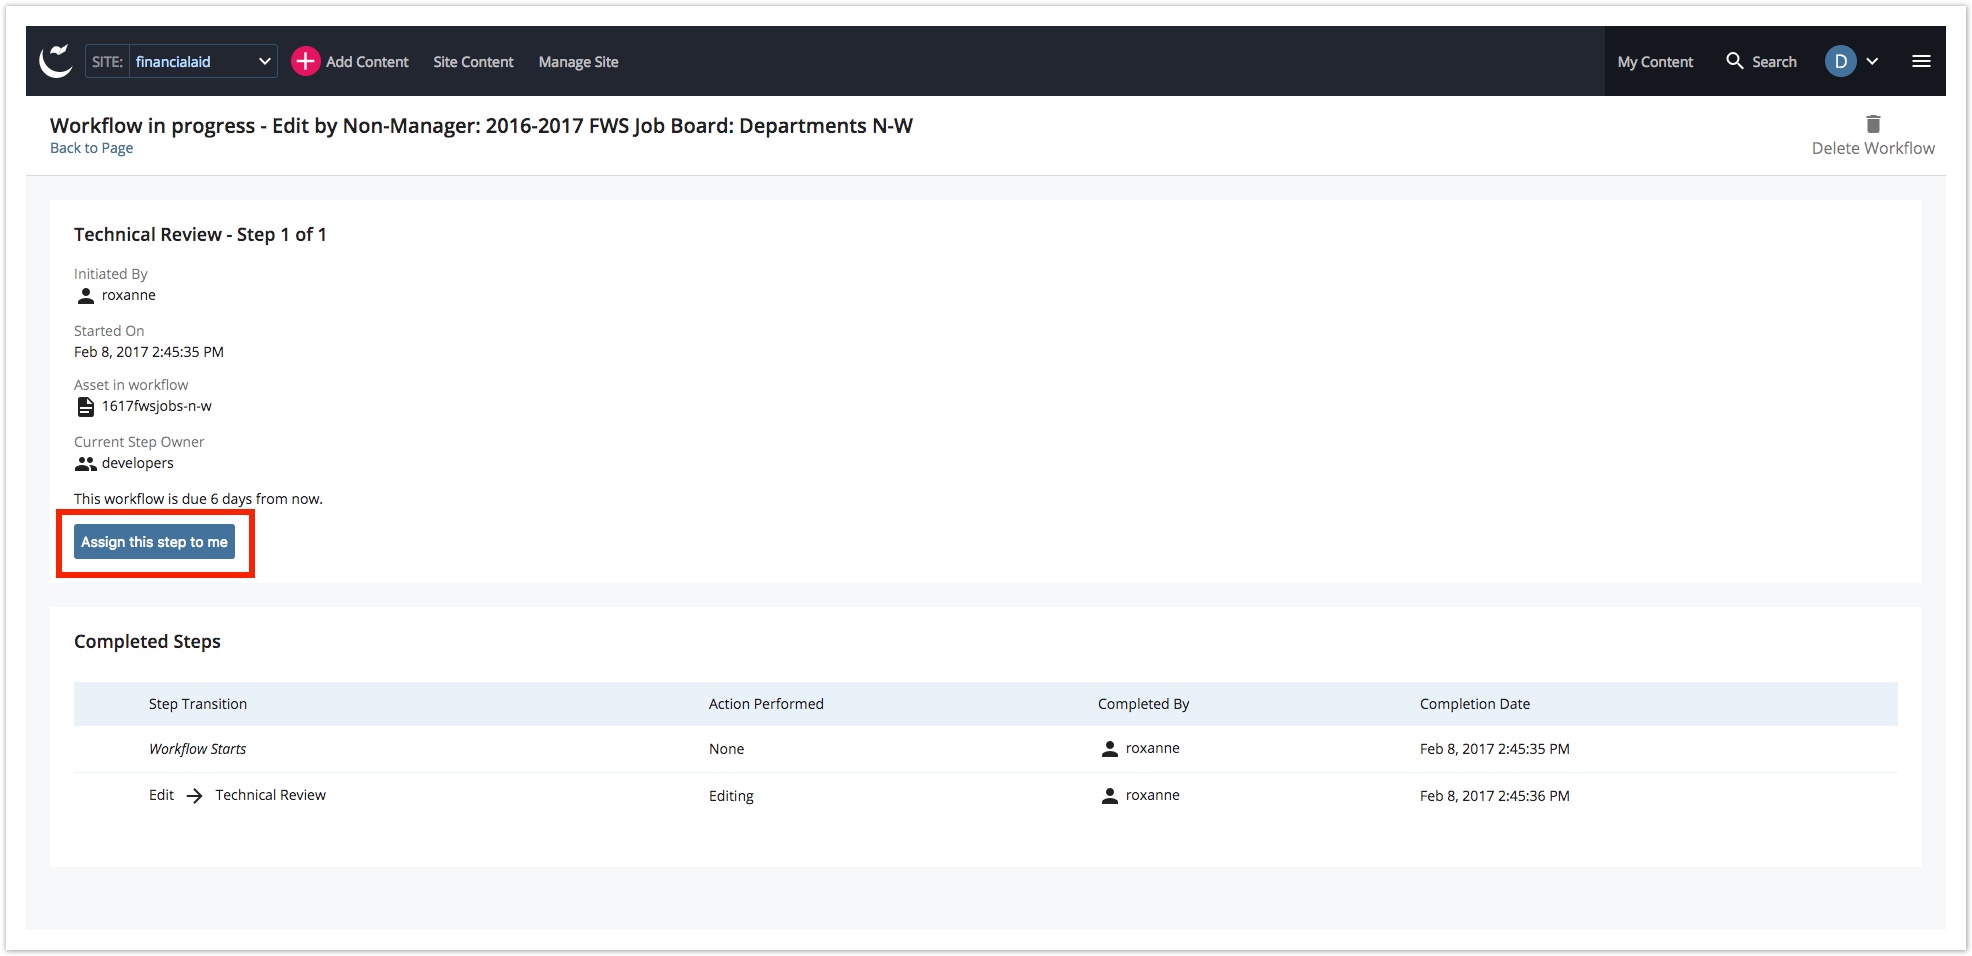
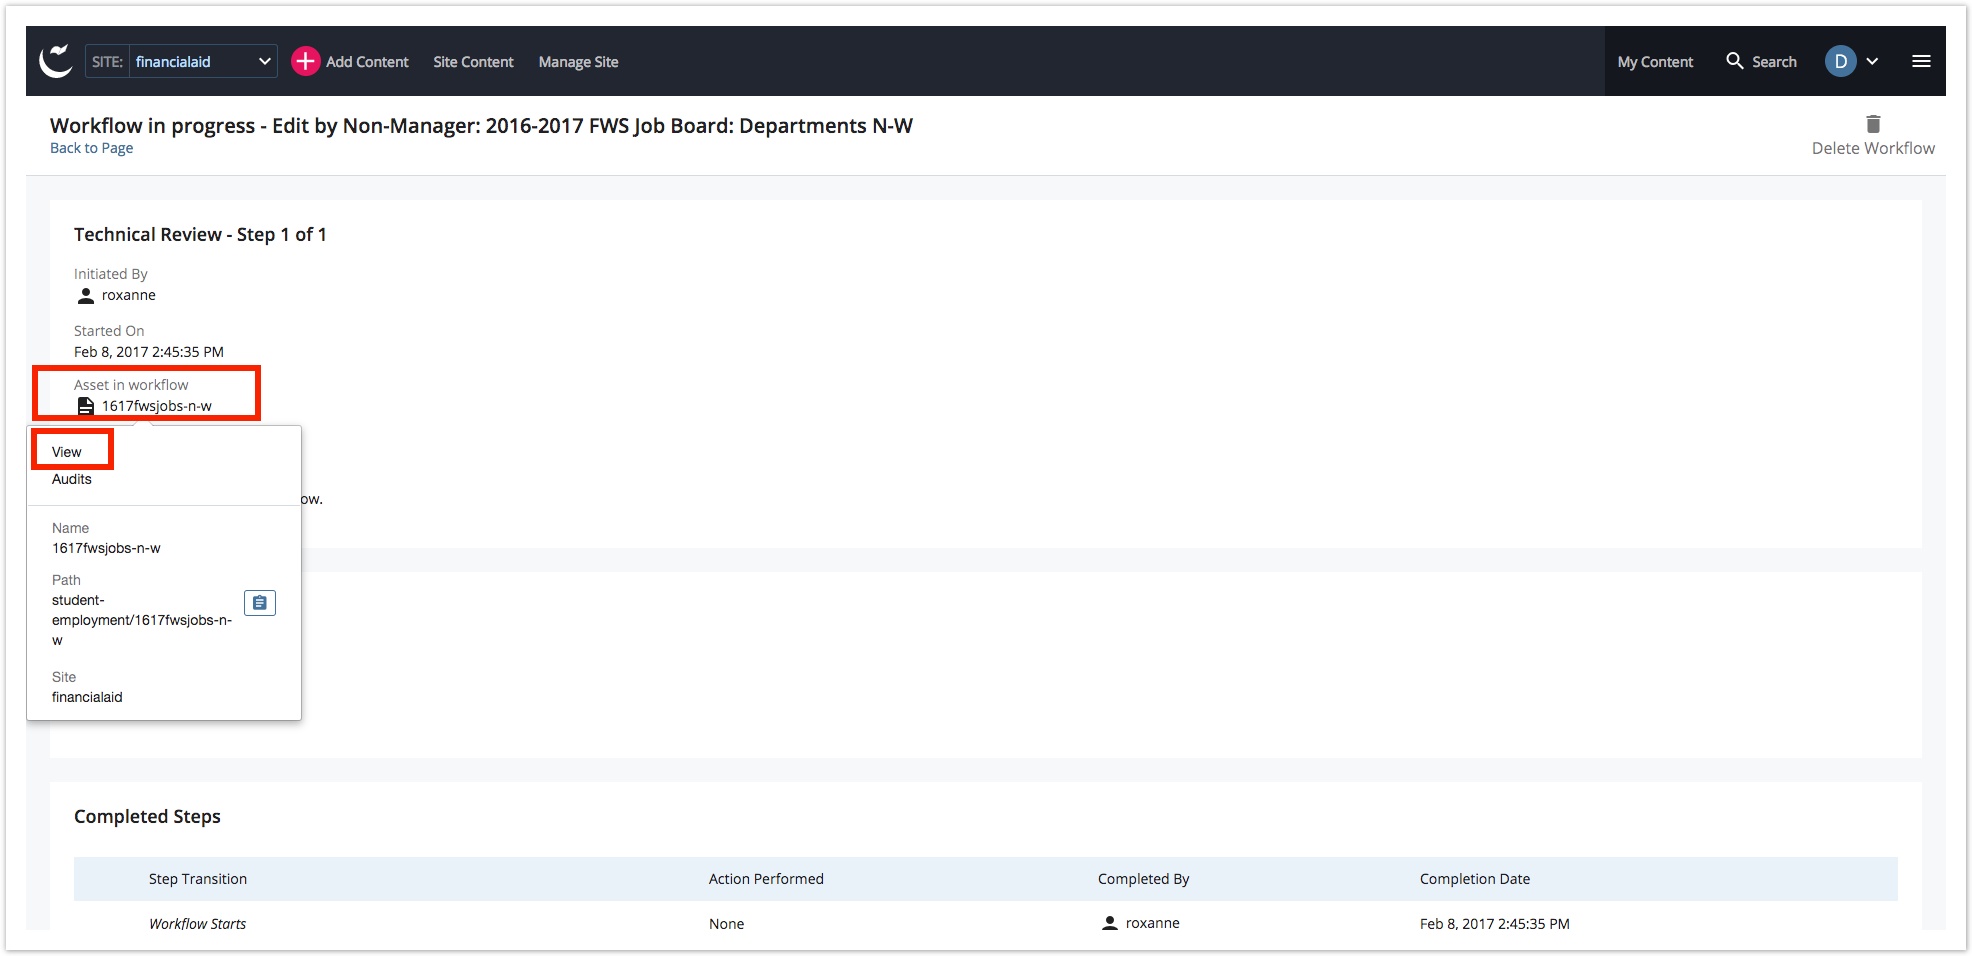
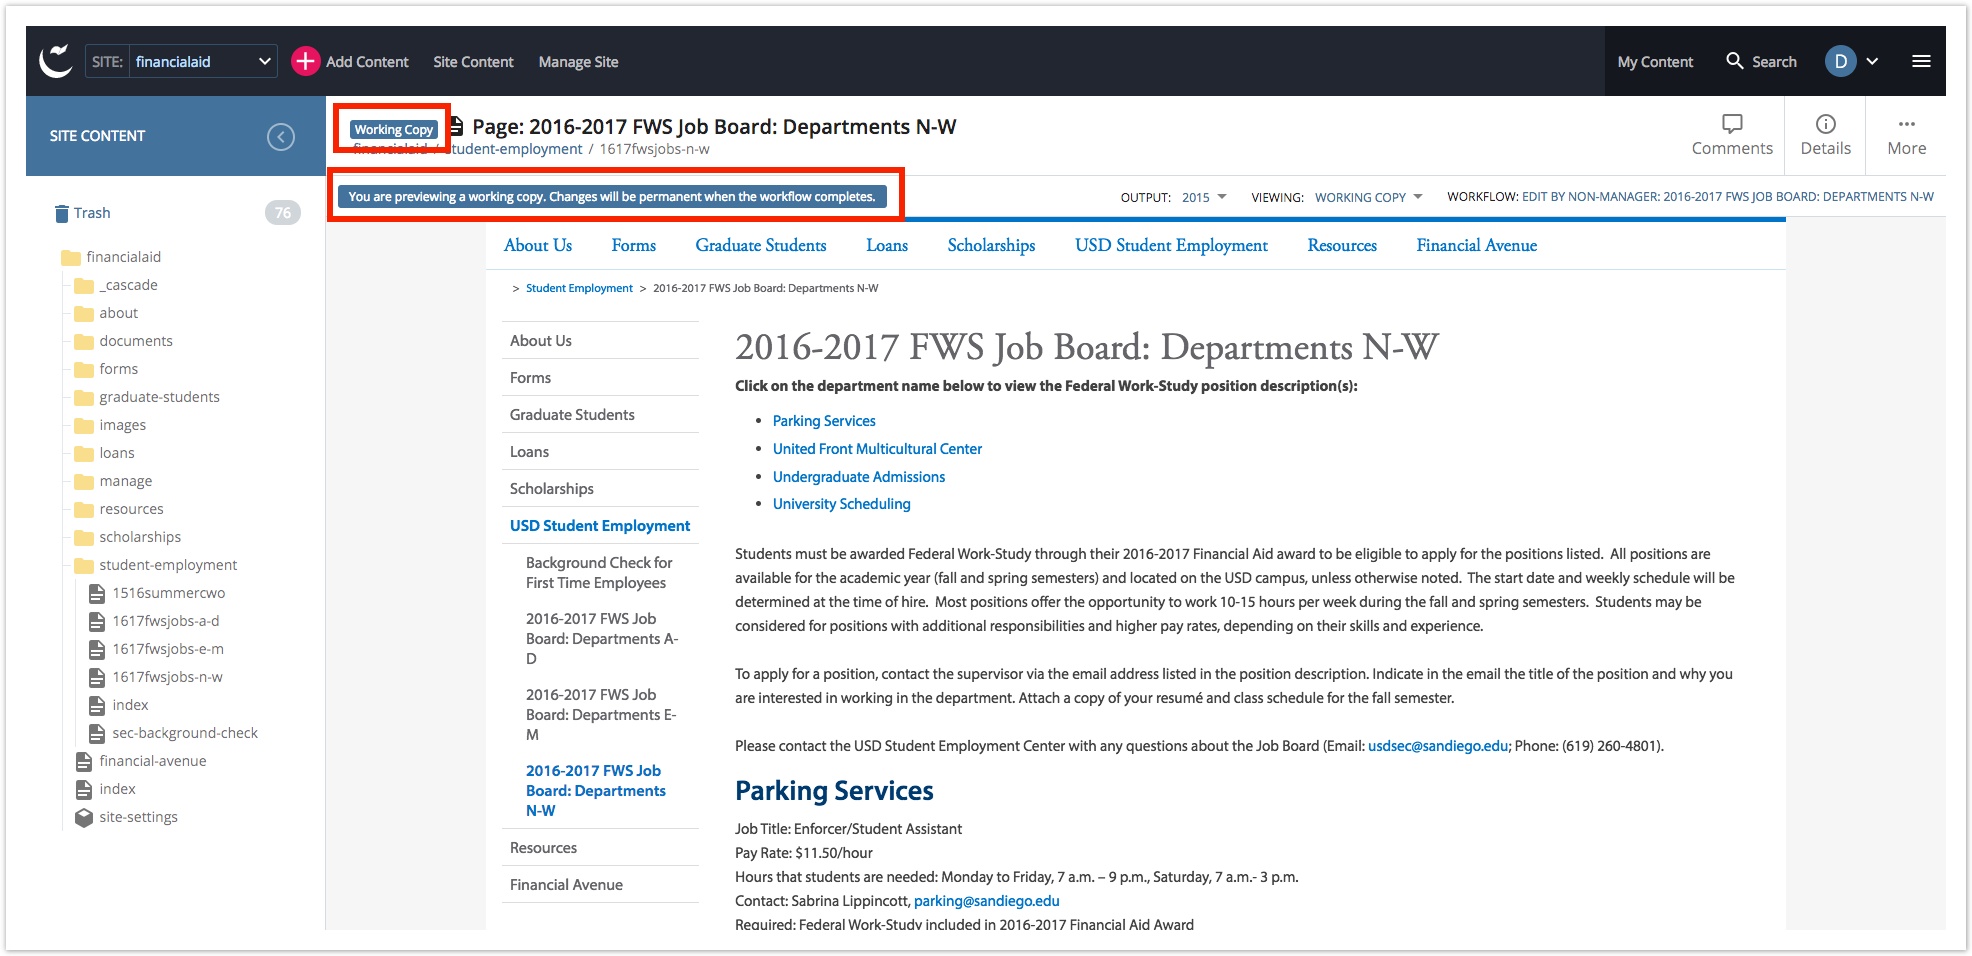
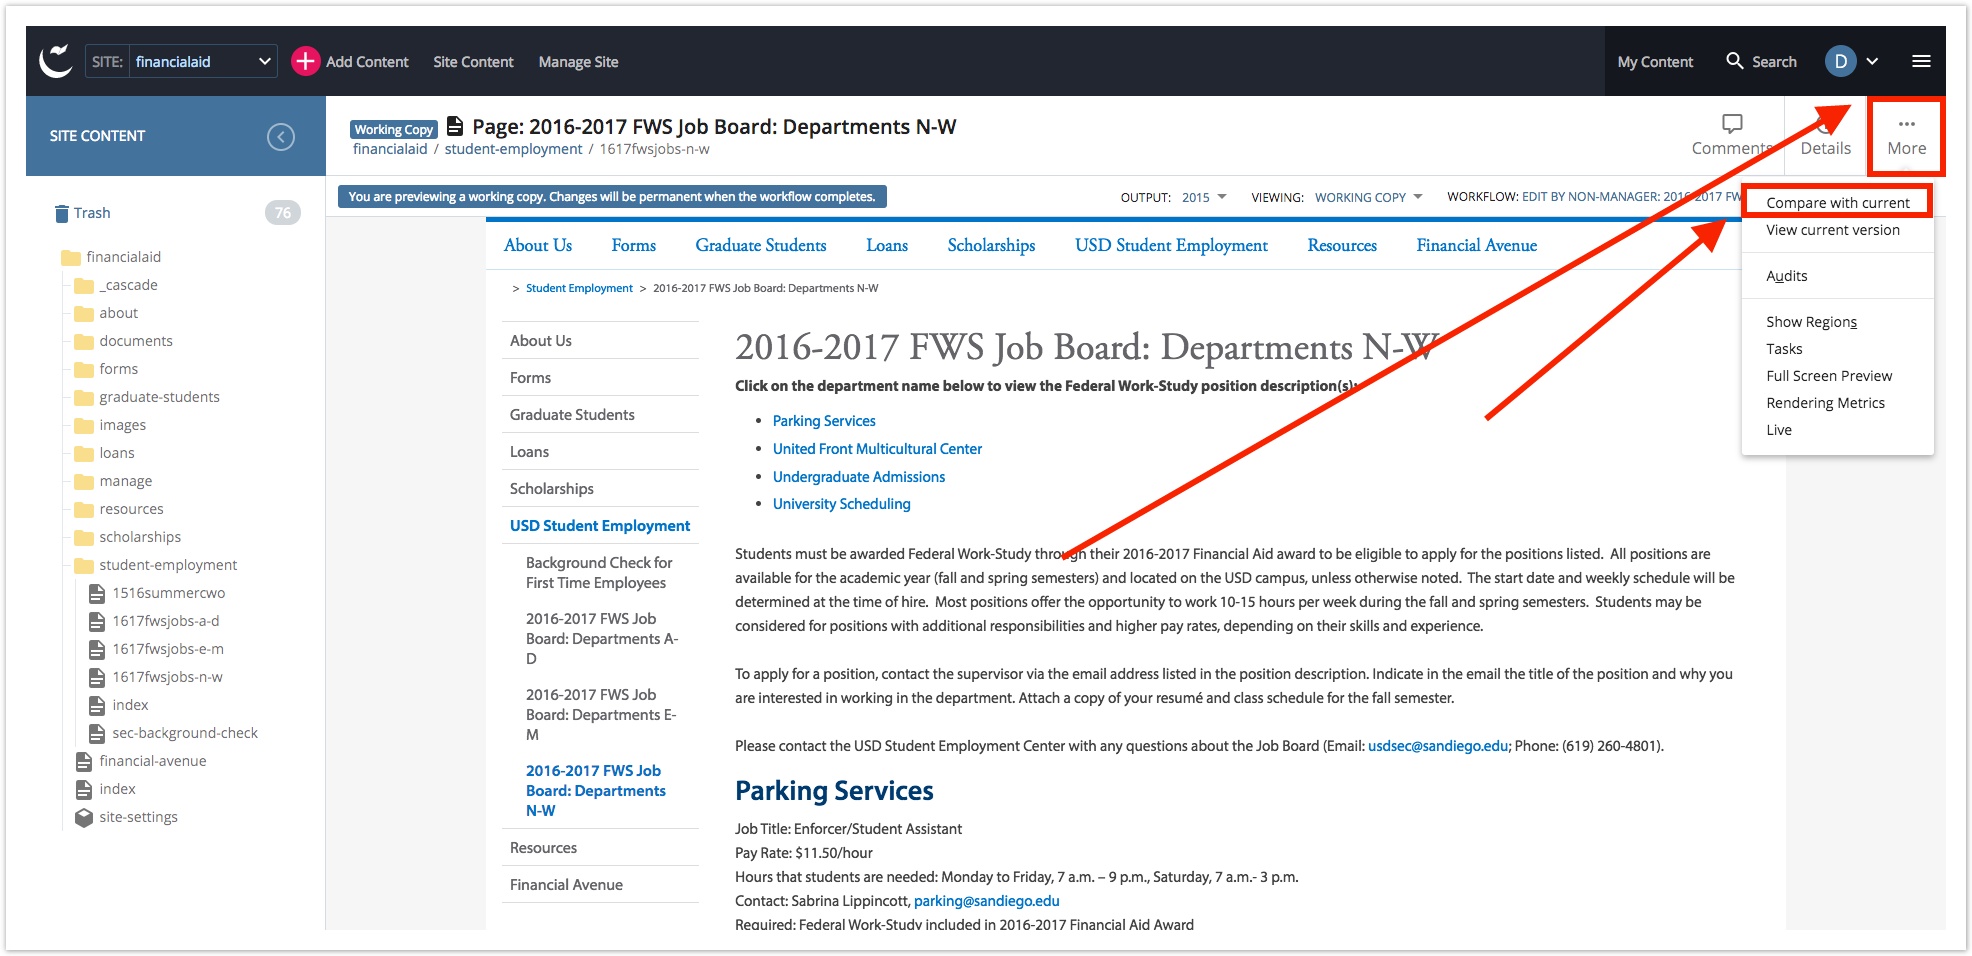
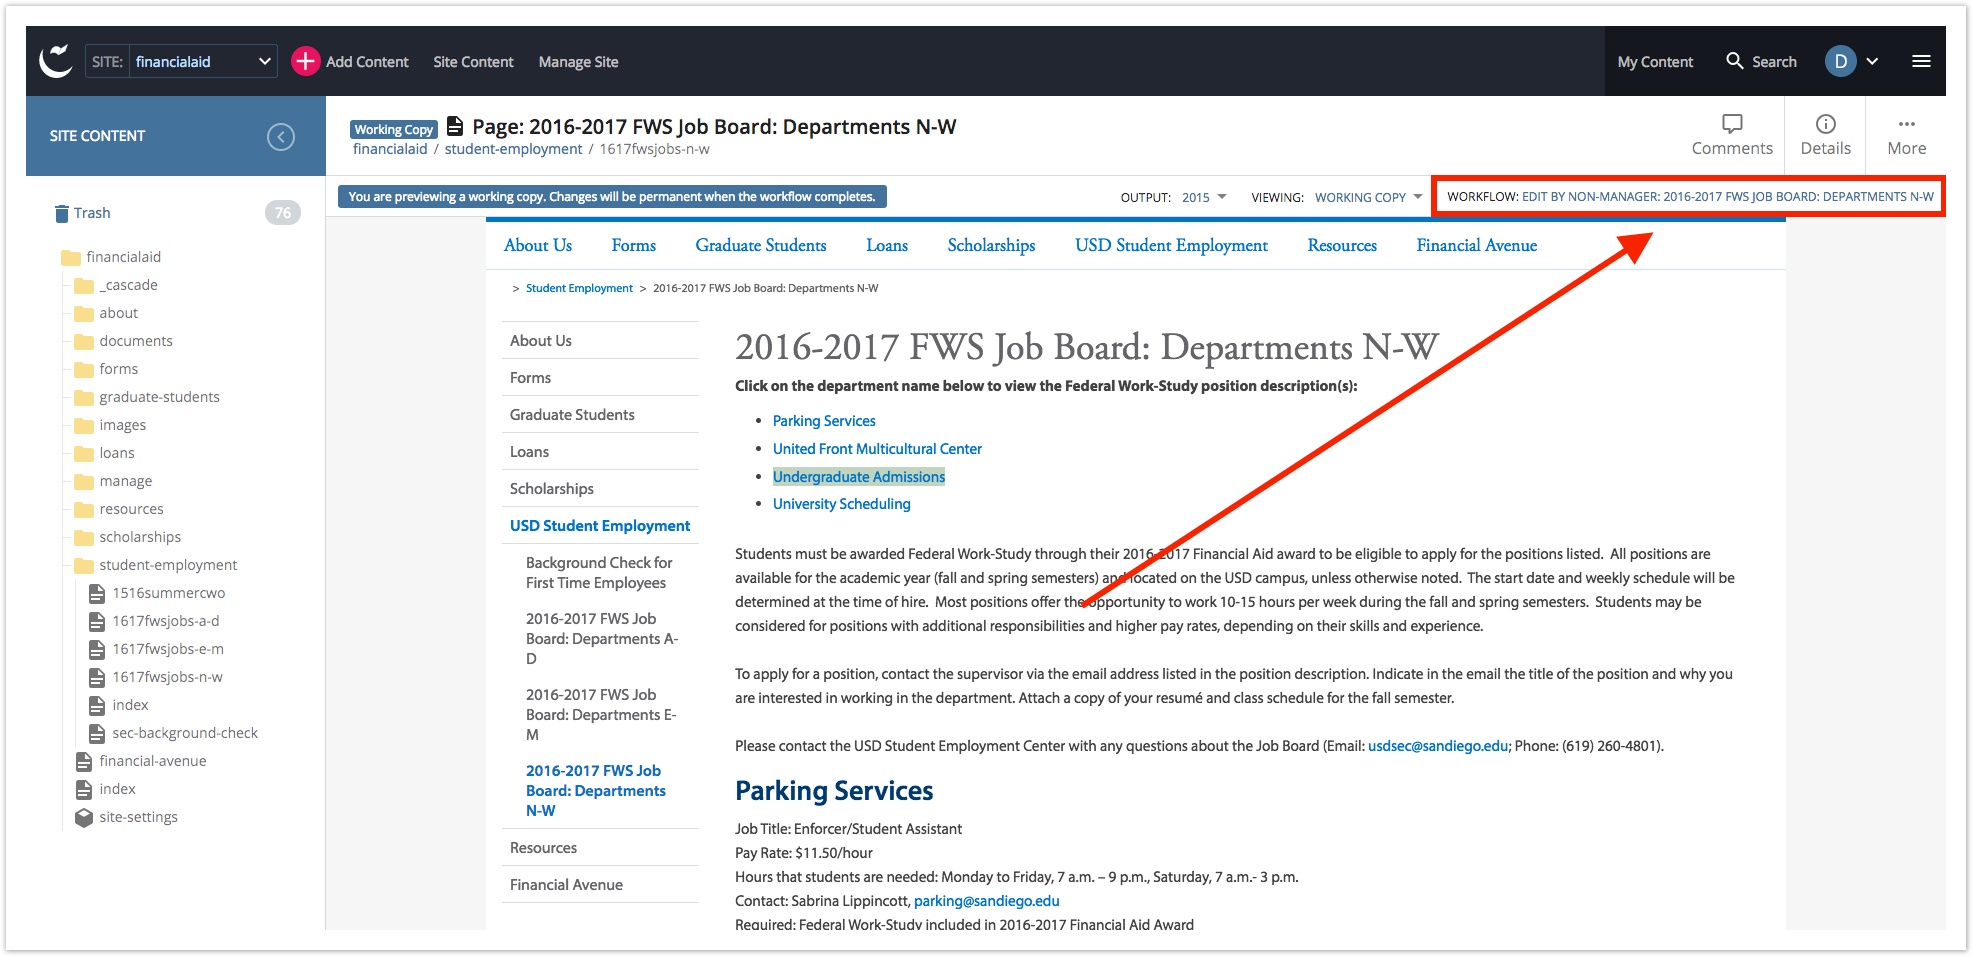
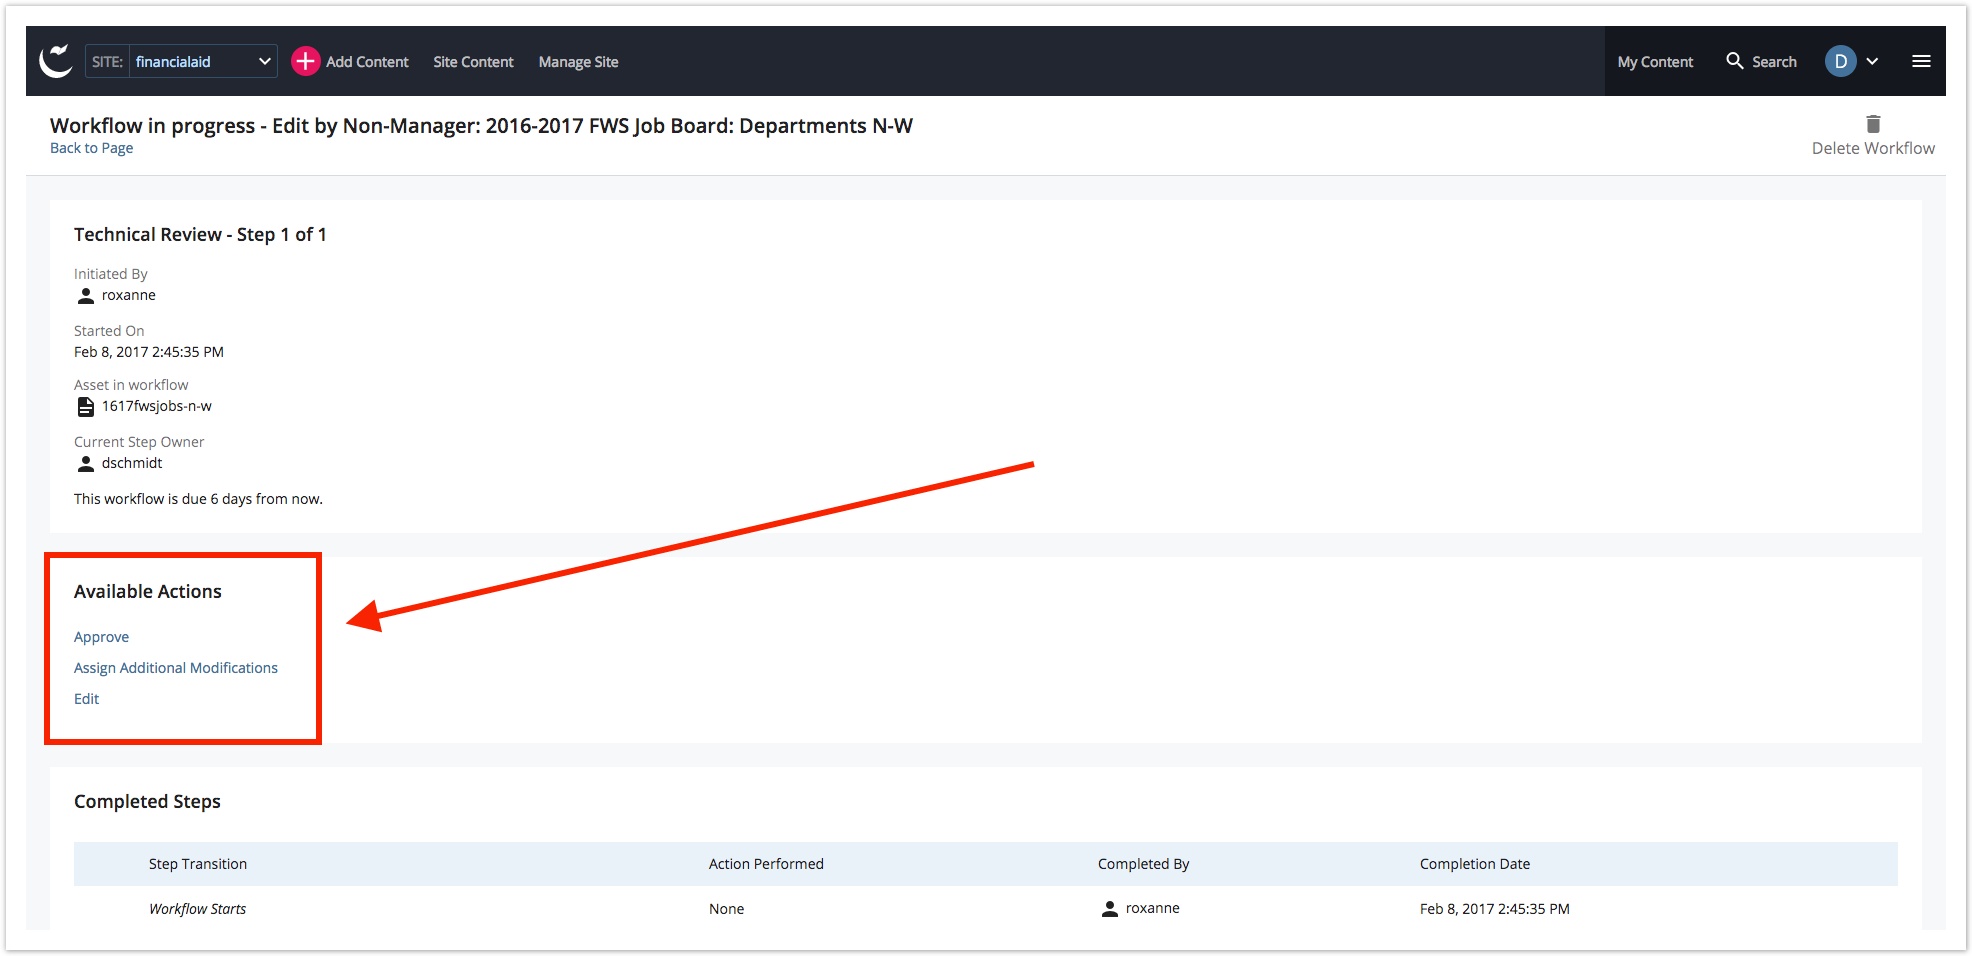
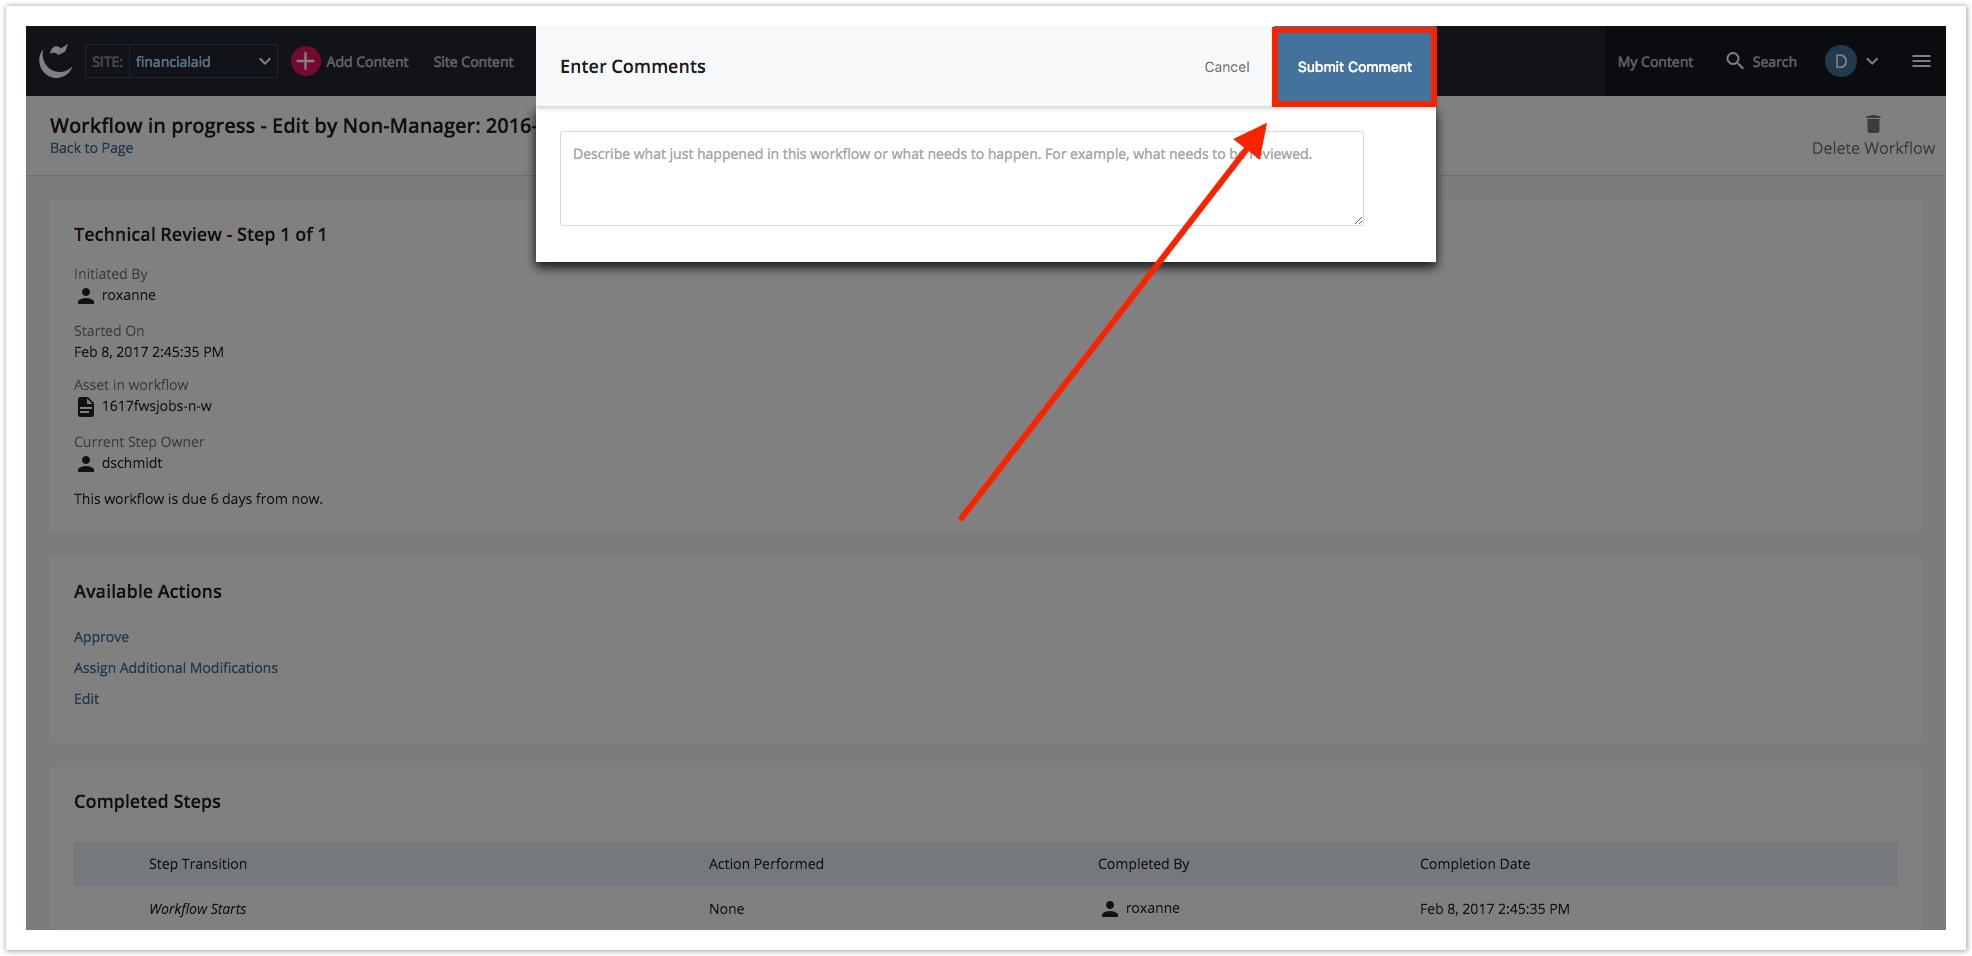
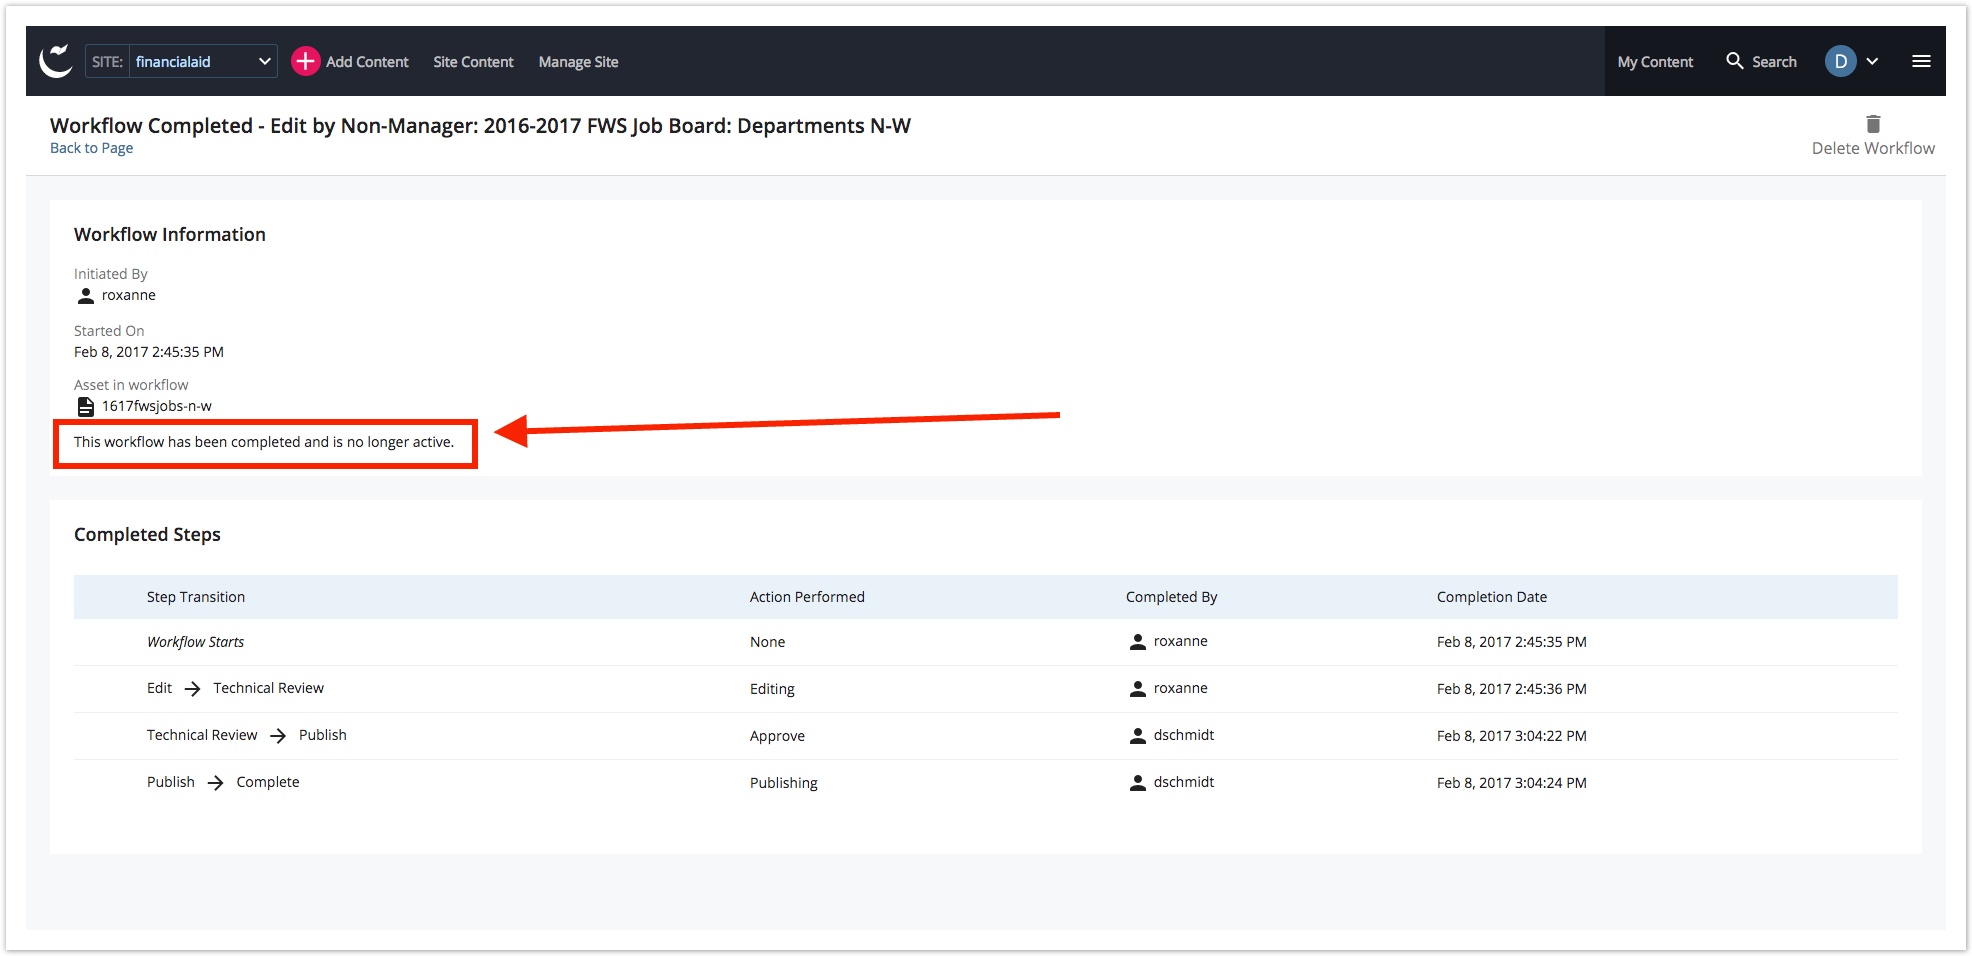
This process is for Content Reviewers and Technical Reviewers. Click the Assign this step to me button. Click on the Workflow to view it. Alternatively, you can right-click on it to bring up the Shortcut Menu, then select the option for View. Once viewing the Workflow, notice the styling notifications that let you know it's a Workflow and not a regular asset. Click the More button, then select Compare with Current. Now is the time to review the edits made to the page. Edits highlighted in green are additions, those highlighted in purple are alterations (including changes to links), and highlights in red are changes where something was removed. Once your review is complete, click the Workflow Link. Select the required action by clicking on the appropriate link. Add a comment to the Comment Window if necessary. Otherwise (or once the comment is complete), click the Submit Comment button. A notification acknowledges the epic glory of your work.Workflow Approval Process (WAP!)
STEP 1: Assign Workflow to Yourself
STEP 2: View the Workflow
STEP 3: Notice the Glory
STEP 4: Compare with Current
STEP 5: After Review → Return to Workflow
STEP 6: Approve, Edit, or Assign Additional Modifications
STEP 7: Comment
STEP 8: Admire the Completion of Your Efforts
