Content Editing
- David Schmidt
- Jasmine Yang (Unlicensed)
Table of Contents
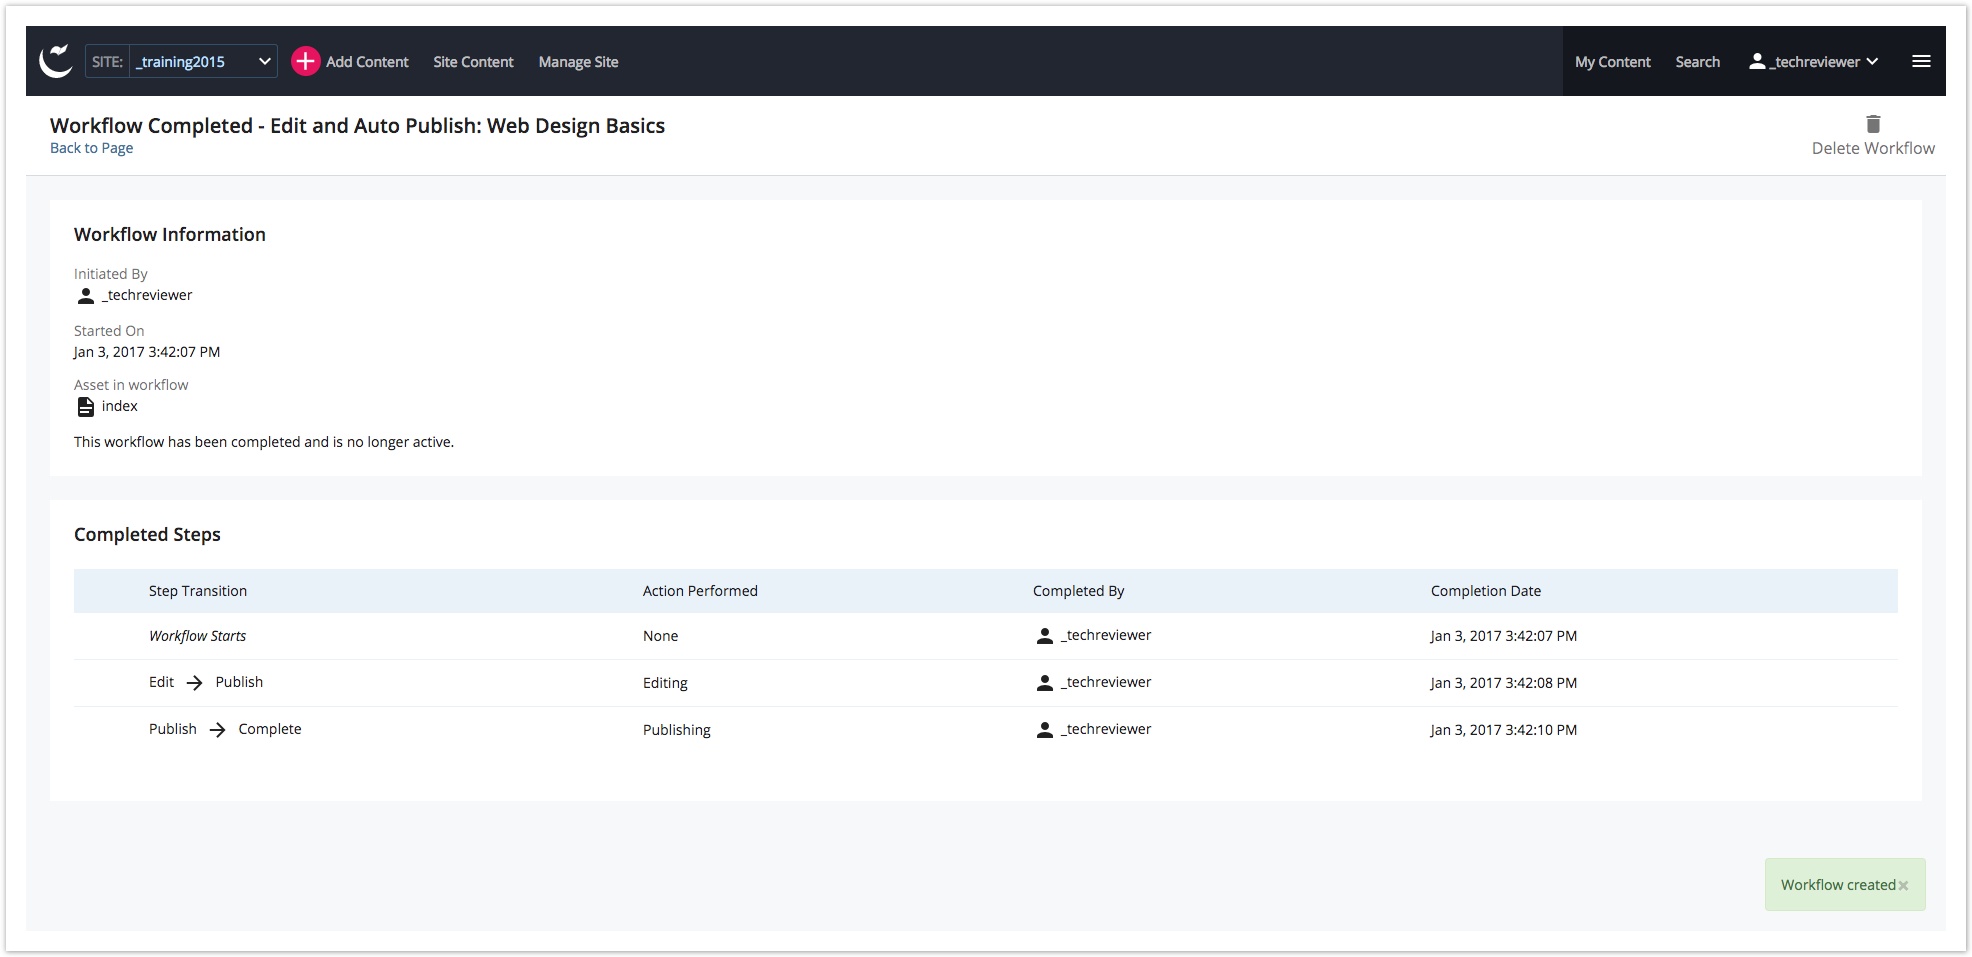
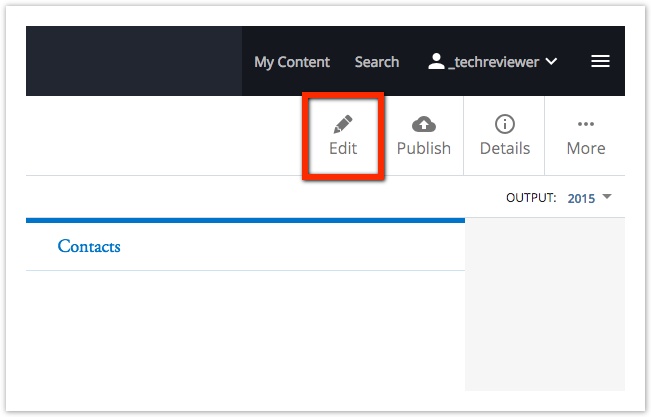
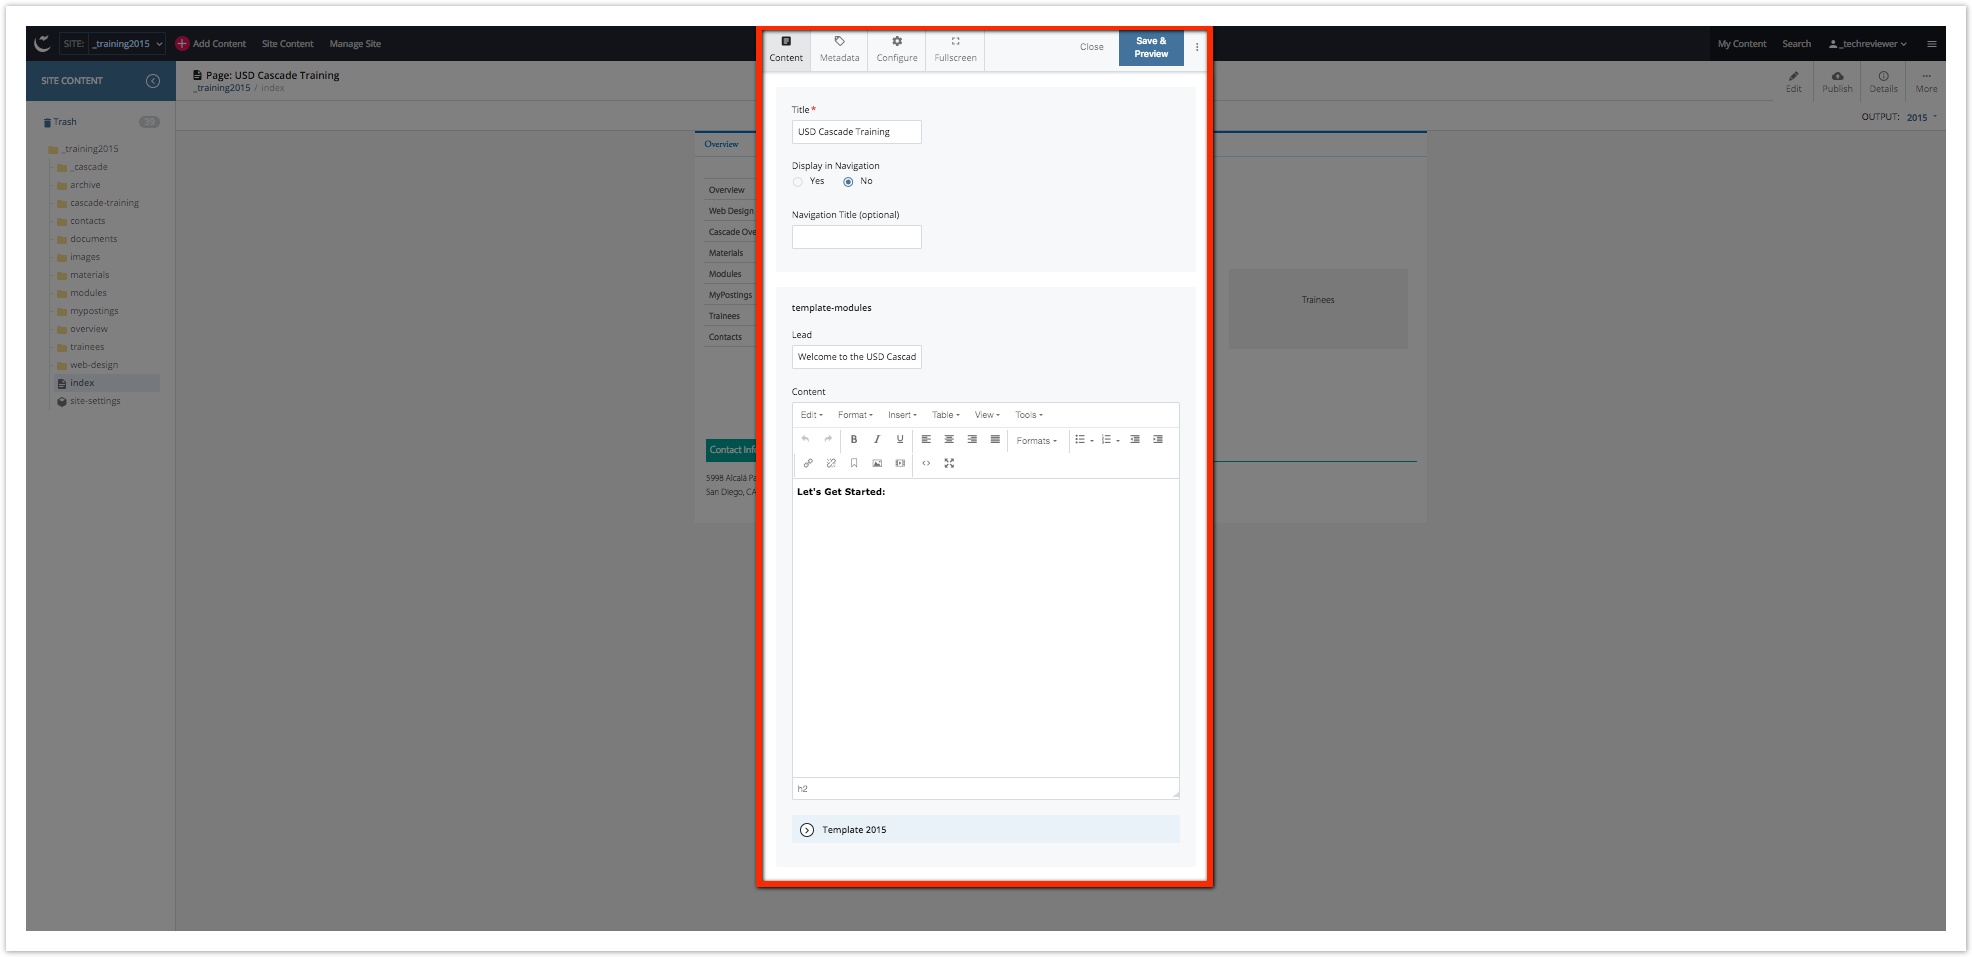
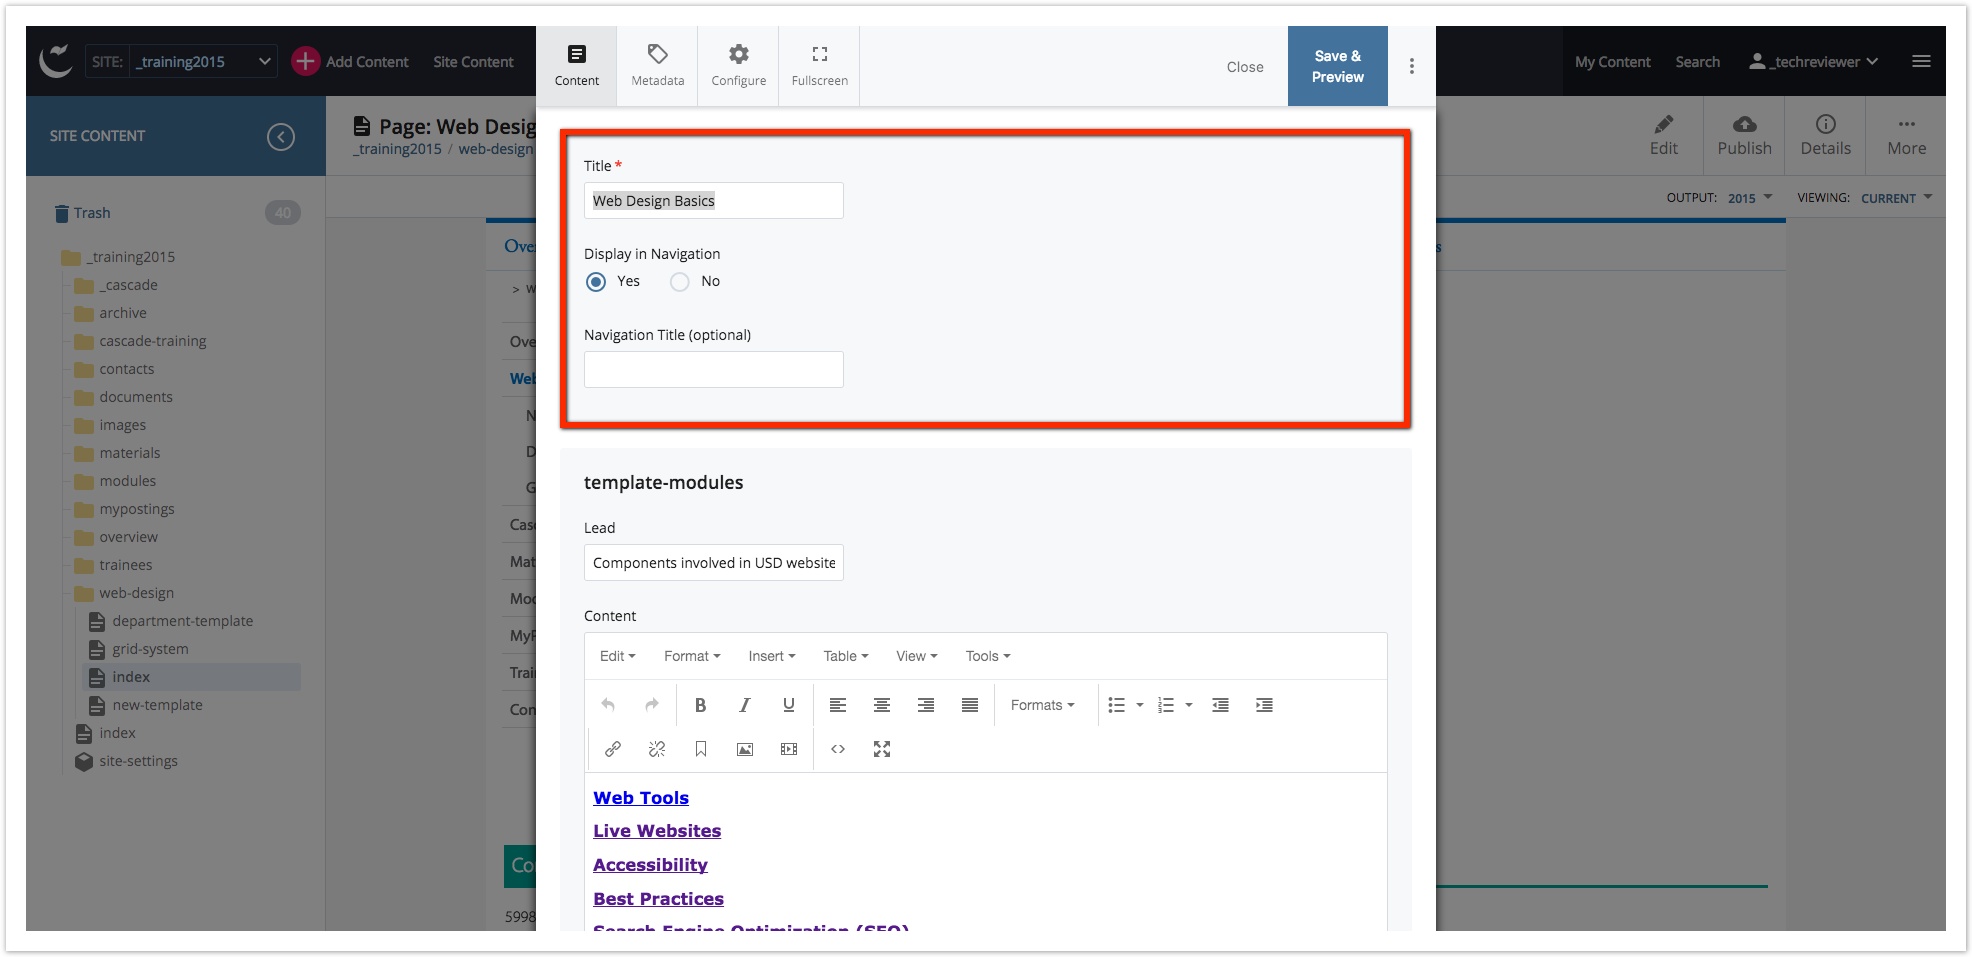
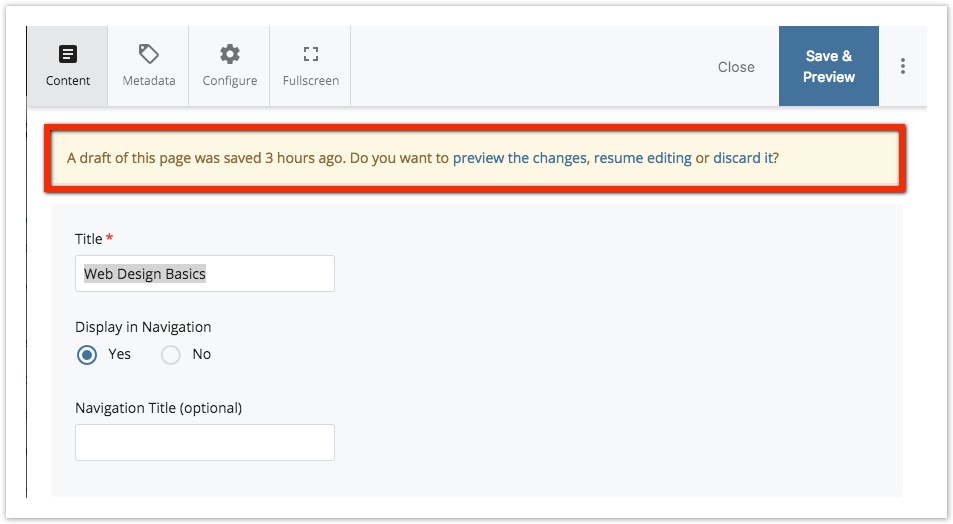
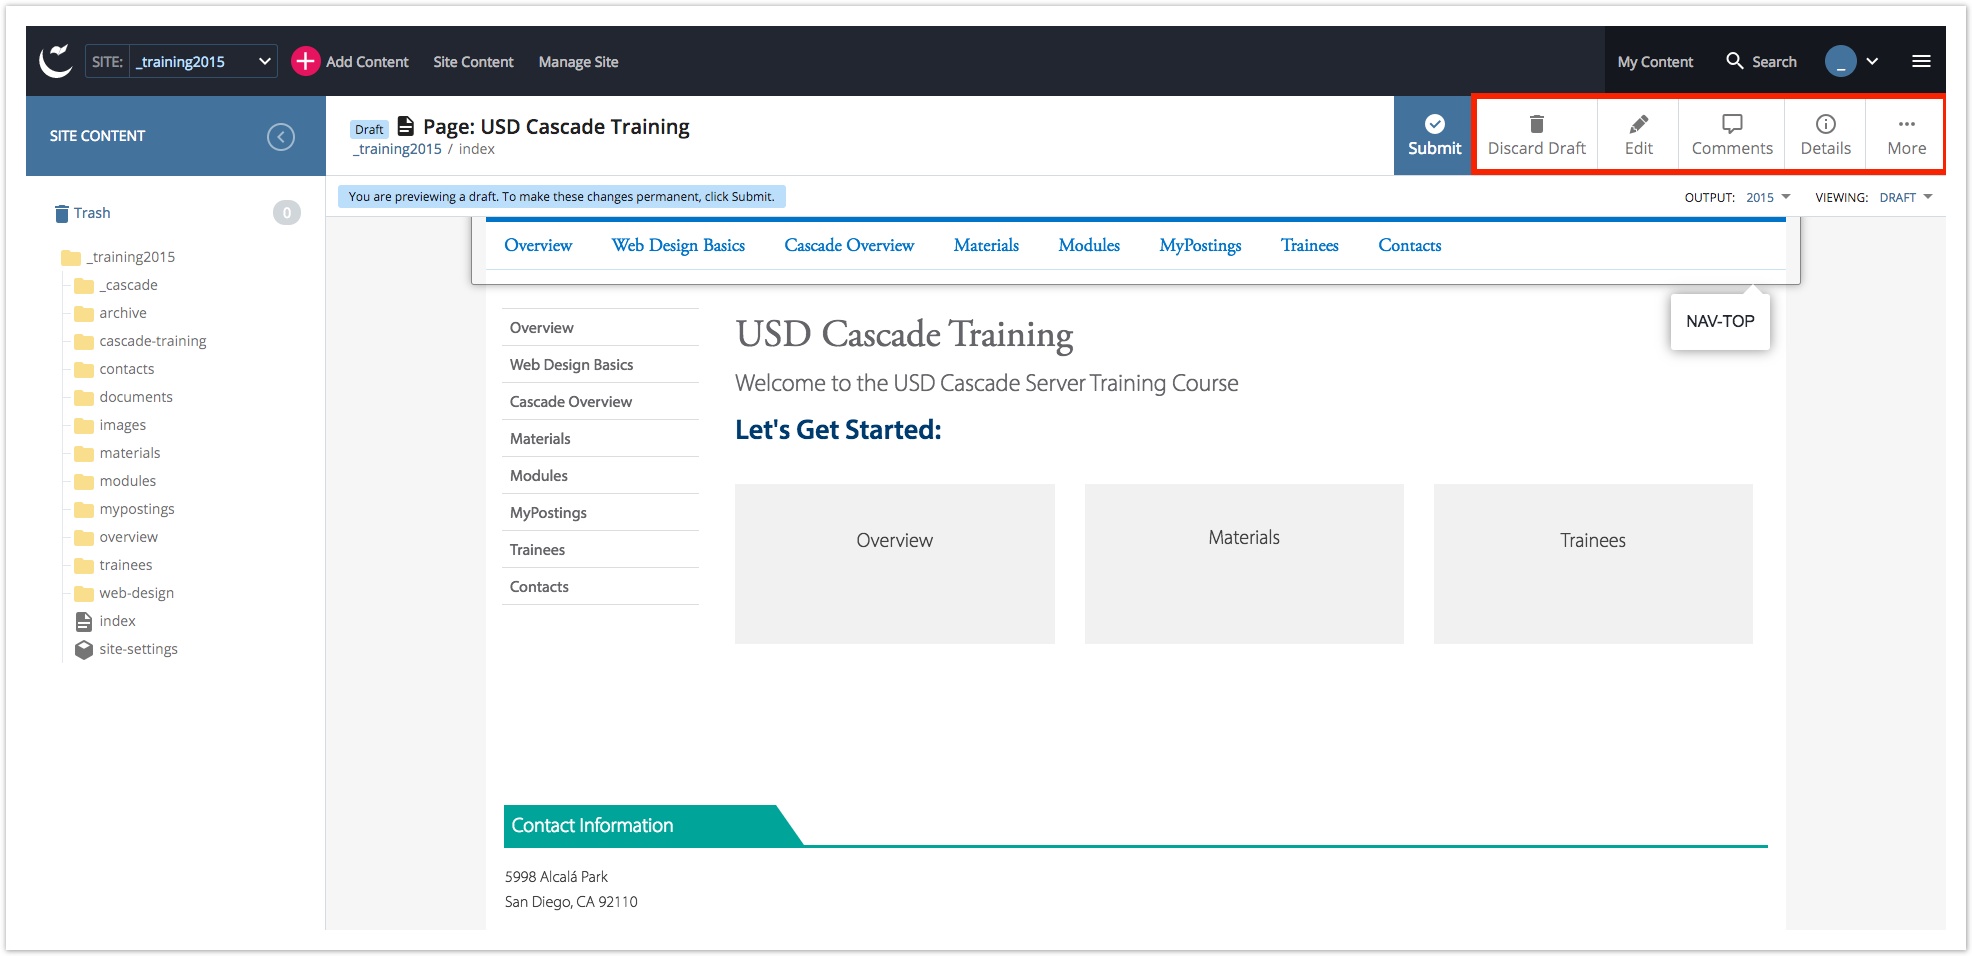
Check to make sure the correct site is selected in the Site Selector. Then, use the Explorer to select the page to edit. Next, select Edit from the Action Bar. The Modifier Pane displays with the Editing Window showing in the Workspace. Use the Editing Window to add and modify content on the page. If the page contains Modules, they will appear by clicking on the Template 2015 button at the bottom of the Editing Window. A page's Title is important for several reasons: Enter the page title in the Title Field. If you want the page to display in the website’s menu, select Yes in the Display in Navigation Field. The Navigation Title (optional) Field is also optional. Use this field to display a shorter title for the asset in the site's navigation. Optionally, a Lead can be added to pages. A Lead is the top portion of section of the page with slightly larger styling to the font. An example of a Lead appears below the screenshot to the right. To add a Lead to the page, enter the text for the Lead into the Lead Field. You can see an example of the Lead Field in the screenshot to the right. It appears directly under the words for template-modules. After making edits, click the Save & Preview button in the Confirmation Toolbar. The Modifier Pane will disappear, and the Workspace will display a preview showing the draft with your current edits. If you Edit a page with a saved draft, a message will display at the top of the Editing Window. Click any of the options to do the following: Preview the Changes: Shows the View version of the page. Resume Editing: Allows for the continuation of editing to the saved draft. Discard It: Erases the saved draft and returns the Editing Window to the data present on the live version. Besides the option for Submit, there are five other ways to finish the editing process. All of the options are located in the Confirmation Pane. Discard Draft Click the Discard Draft button to discard all edits. There is no way to reclaim edits that have been discarded. Edit After previewing, clicking the Edit button will once again allow you to resume making changes to the saved draft. Comments Comments can be added using the text box in the panel with the Submit button. Comments are not displayed in the page and are only used in Cascade Server when viewing the version history of a file. Details The Details button displays the Options Pane showing additional information about the selected asset, such as when the last edits were made, and the attached template code. More The More button provides multiple options for moving, renaming, copying, or deleting the selected asset. Comments can be added using the text box in the panel with the Submit Button. Comments are not displayed in the page and are only used in Cascade Server when viewing the version history of a file. After previewing changes, click Submit to begin the final stages to submitting a Workflow. By default, after Save & Preview is clicked, the Workspace displays your saved draft. To view the current version, change your Viewing Output. Only a single draft can be saved at a time for any single asset. If someone else saves a draft to the same page, it will overwrite the previously saved draft. Content Check runs a spell check and an accessibility check on the page. Cascade only displays these pages if it detects spelling or accessibility errors. If there are none, it immediately displays the Star Workflow page. The Spell Check displays each error with options for handling the error. Once all selections have been made, click Submit to continue saving the page. If there are any accessibility issues with the content on a page, an Accessibility Check page will load. The Accessibility Check contains options for how to handle accessibility issues on a page. The Accessibility Check page rarely displays, and generally only does so for tables without a summary included in the content of the page. Select Fix to add a description for the table. Once there are no accessibility issues on the page, the Accessibility Check screen will not appear when saving the page. If there are no Spelling or Accessibility errors on the page, clicking Submit will initiate the Workflow process. Once content edits have been made, submitting the changes initiates the Workflow process. After the workflow details are submitted, a confirmation screen will display. Cascade Server generates an email to notify users in the Approver group there is a task waiting for review. The notification email contains a direct link to the workflow task. Note: Both Content Approvers and Technical Reviewers have the option to return pages for modifications if there are issues to be addressed. Active workflows will appear in the Dashboard, even if the workflow is in a step requiring attention from another user. You can check the status of a Workflow task by clicking on it from the Dashboard. After the Content Review has been completed and submitted, the Workflow task continues to Technical Review. A member of the University Web Services team performs the Technical Review. Once the Technical Review is completed and submitted, the page is published. University Web Services will complete technical Review within 1 business day (typically 24 hours) of receipt. If the workflow task contains an urgent matter, please submit a ticket to http://www.sandiego.edu/web-requests/. The site will require that you include the URL for the page or site that needs to be republished. Review the Workflow Diagram.Content Editing
Begin Editing
Title and Navigation
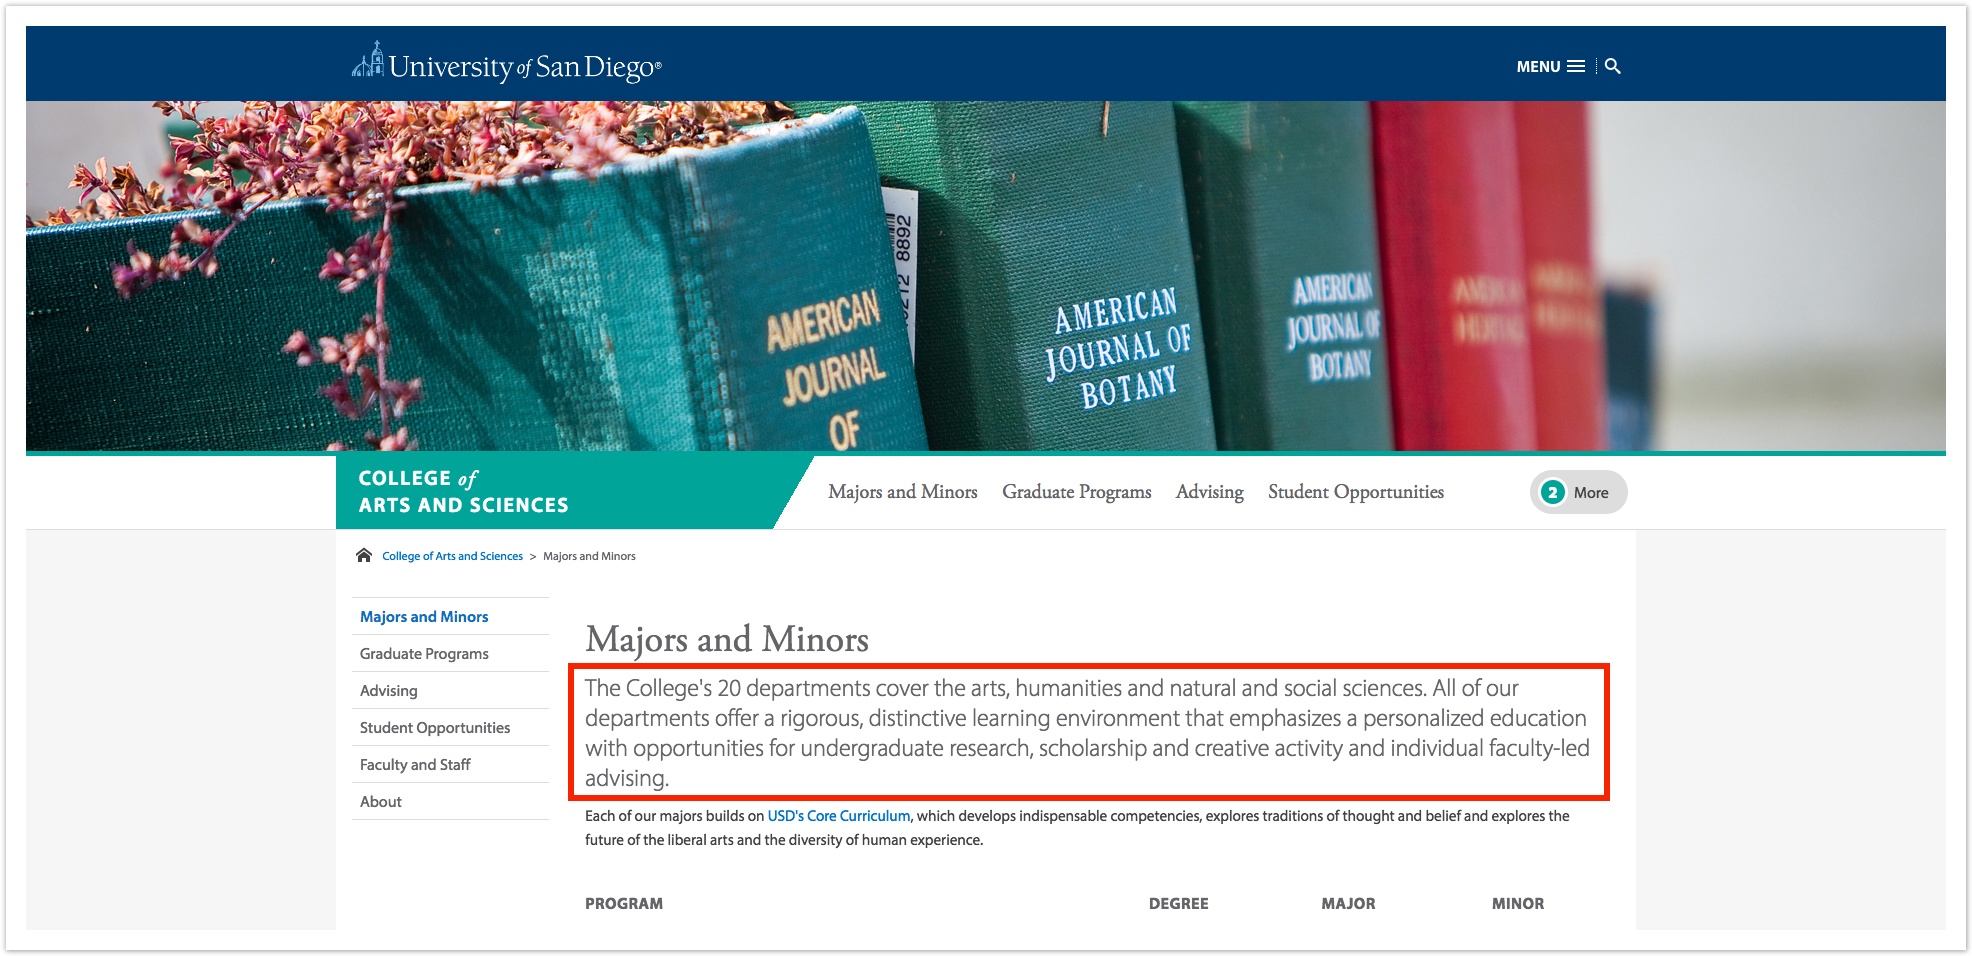
Lead
Save & Preview
Submission Alternatives
Submit
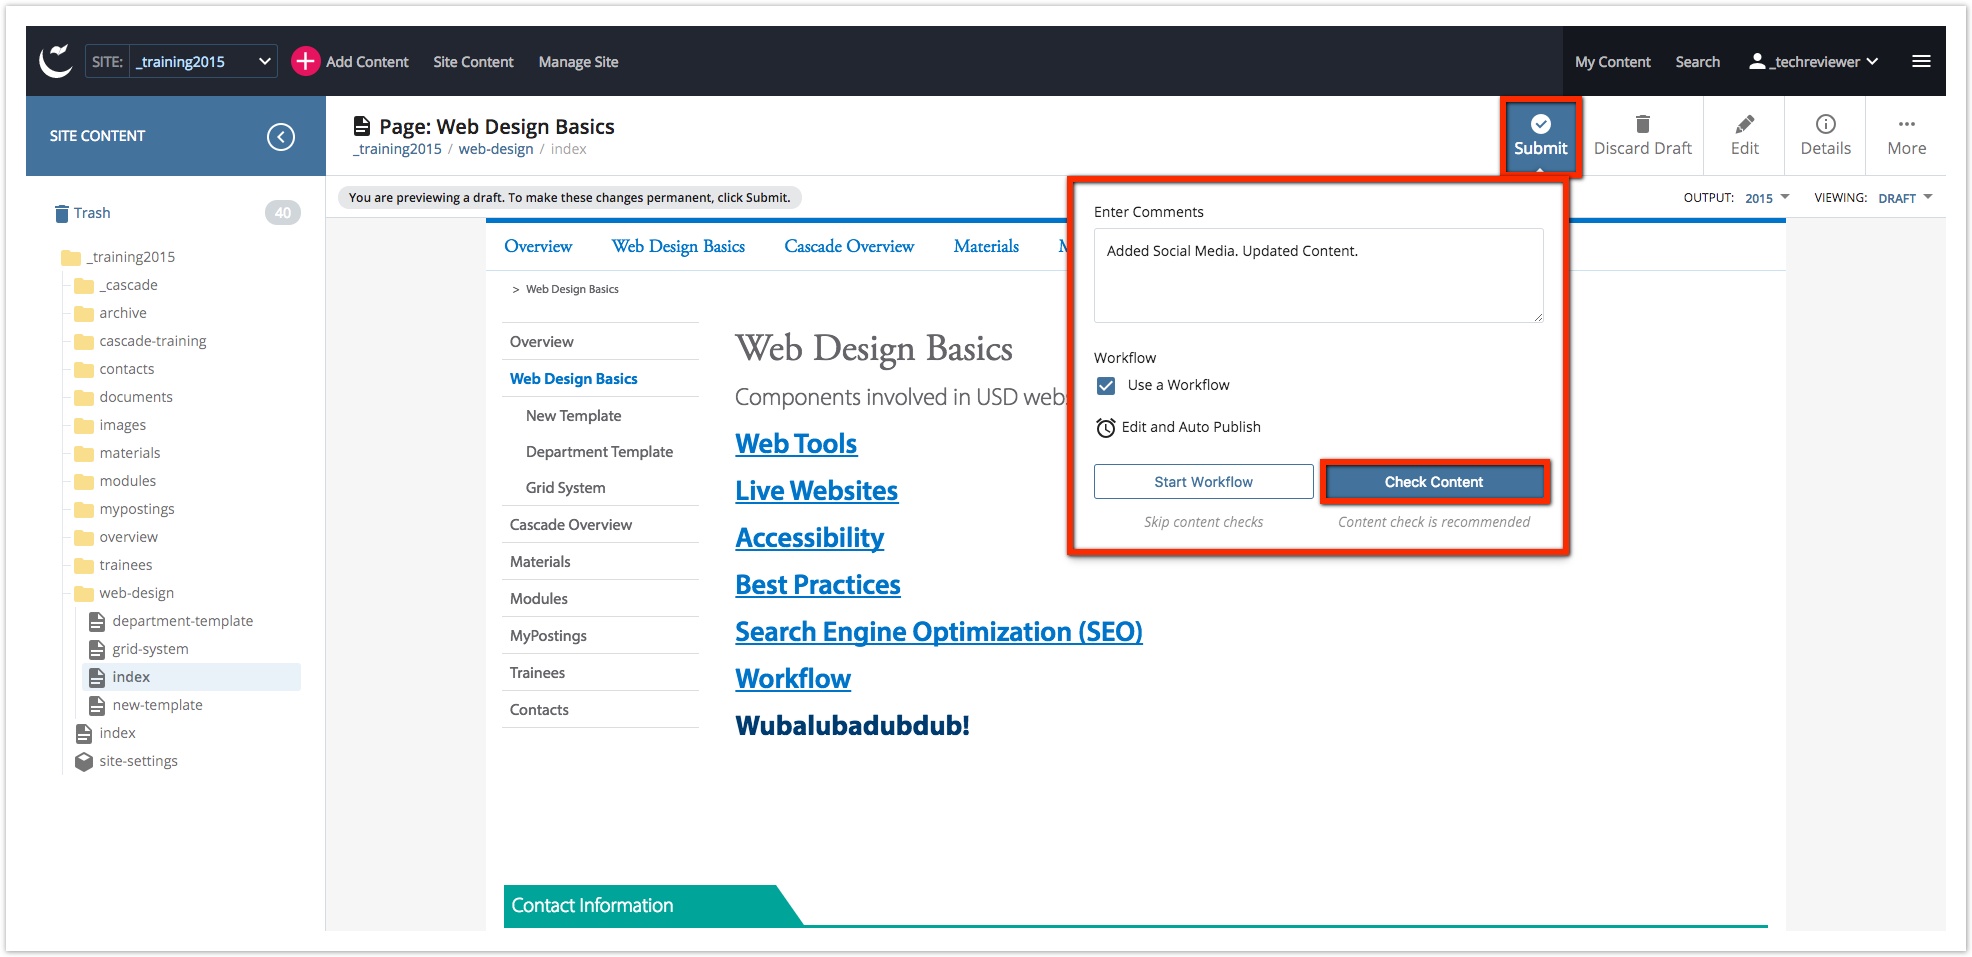
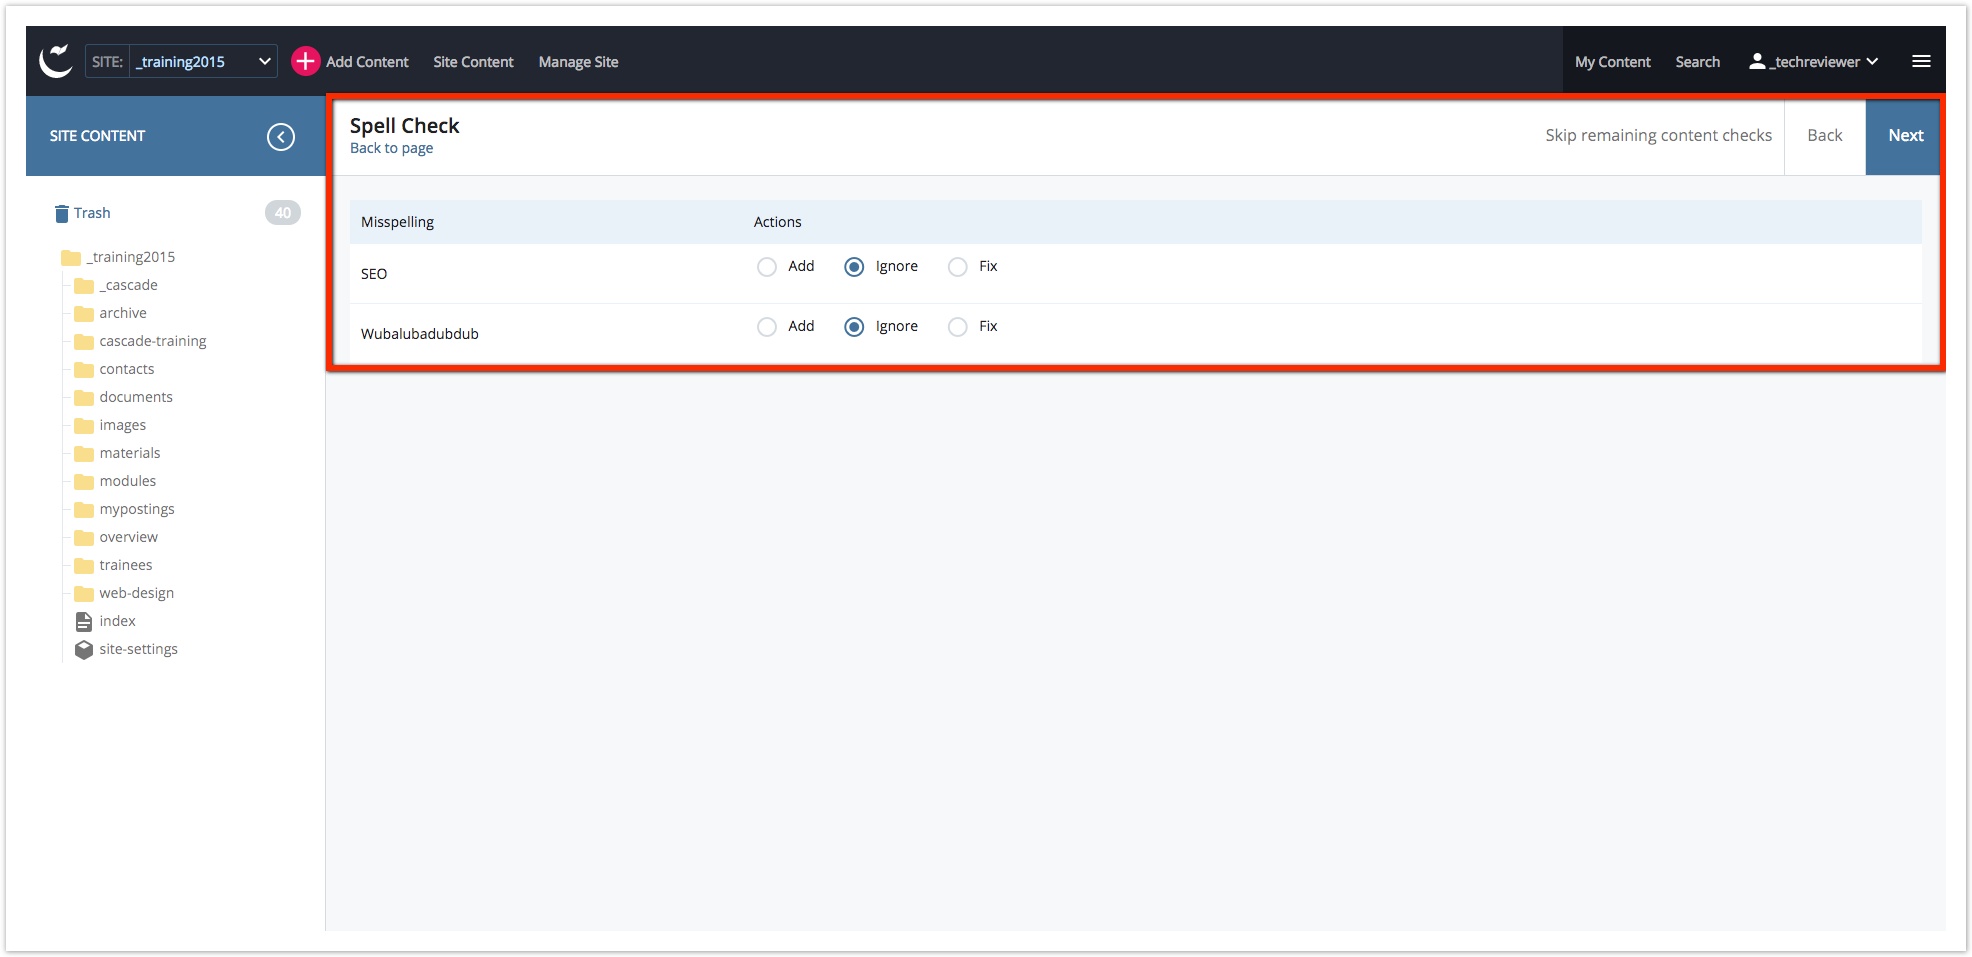
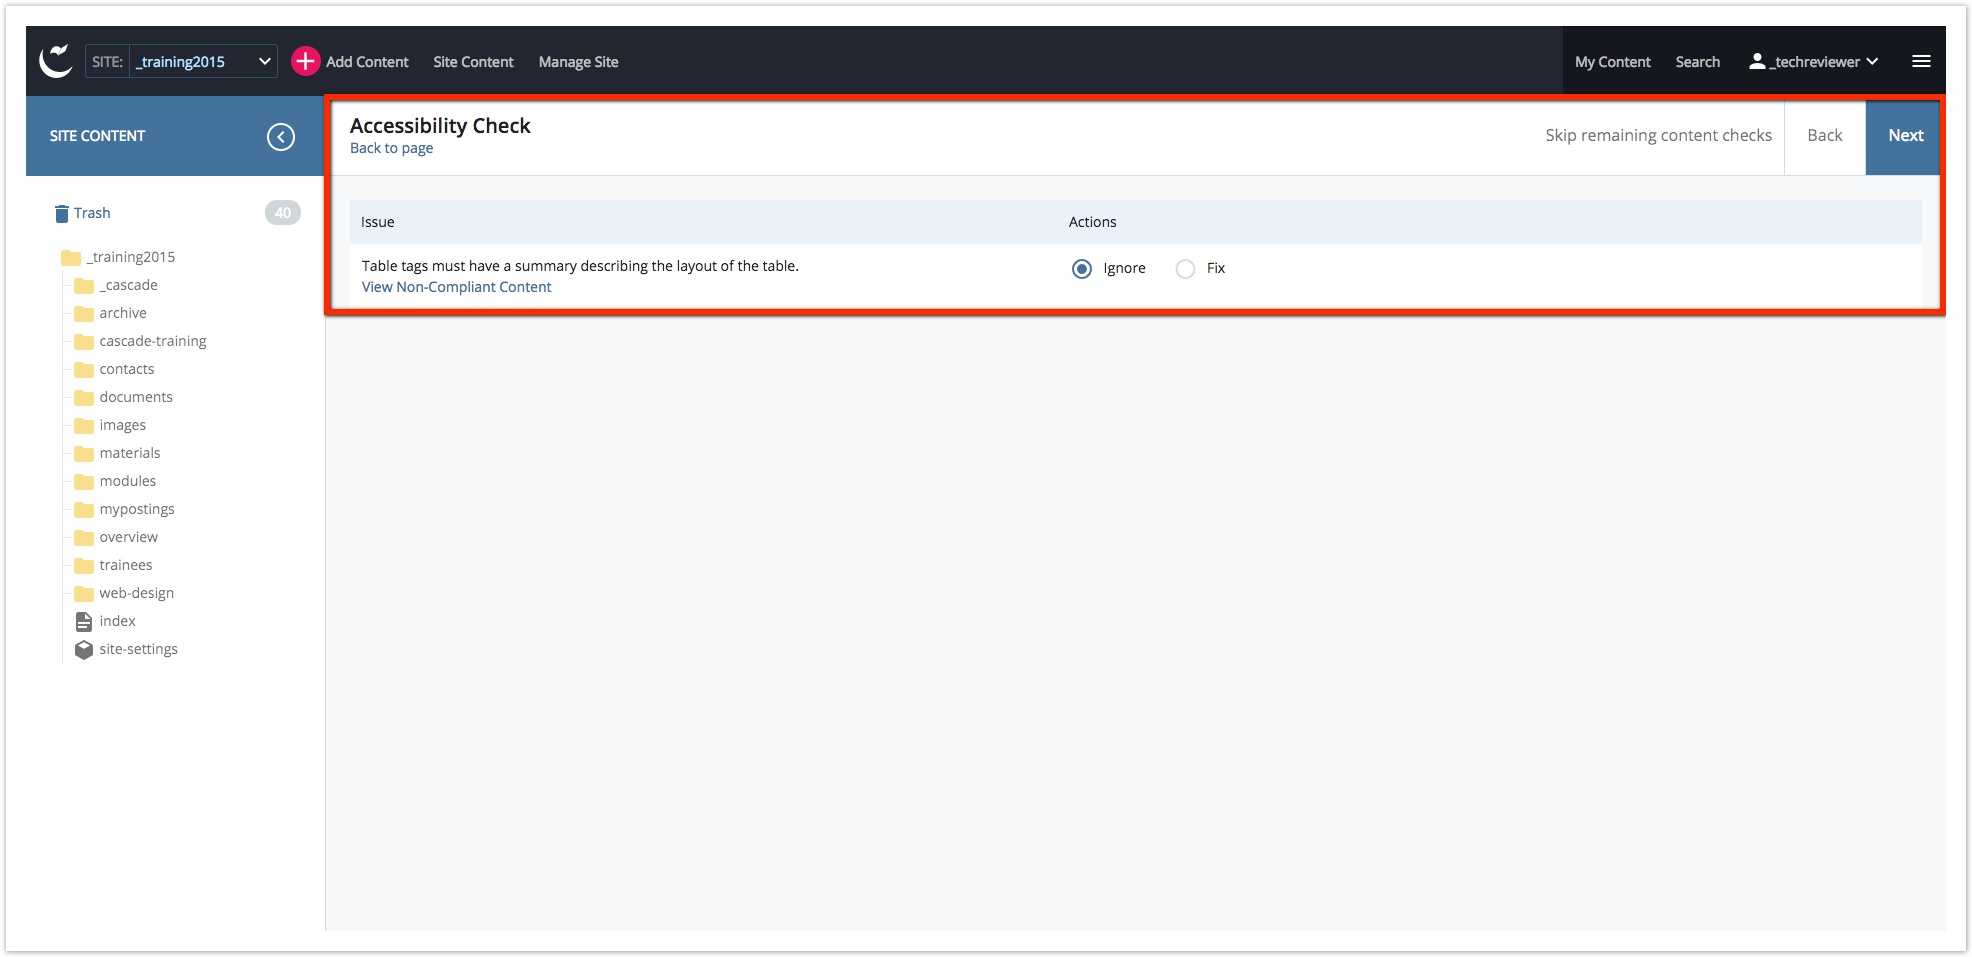
Content Check
Spell Check
Accessibility Check
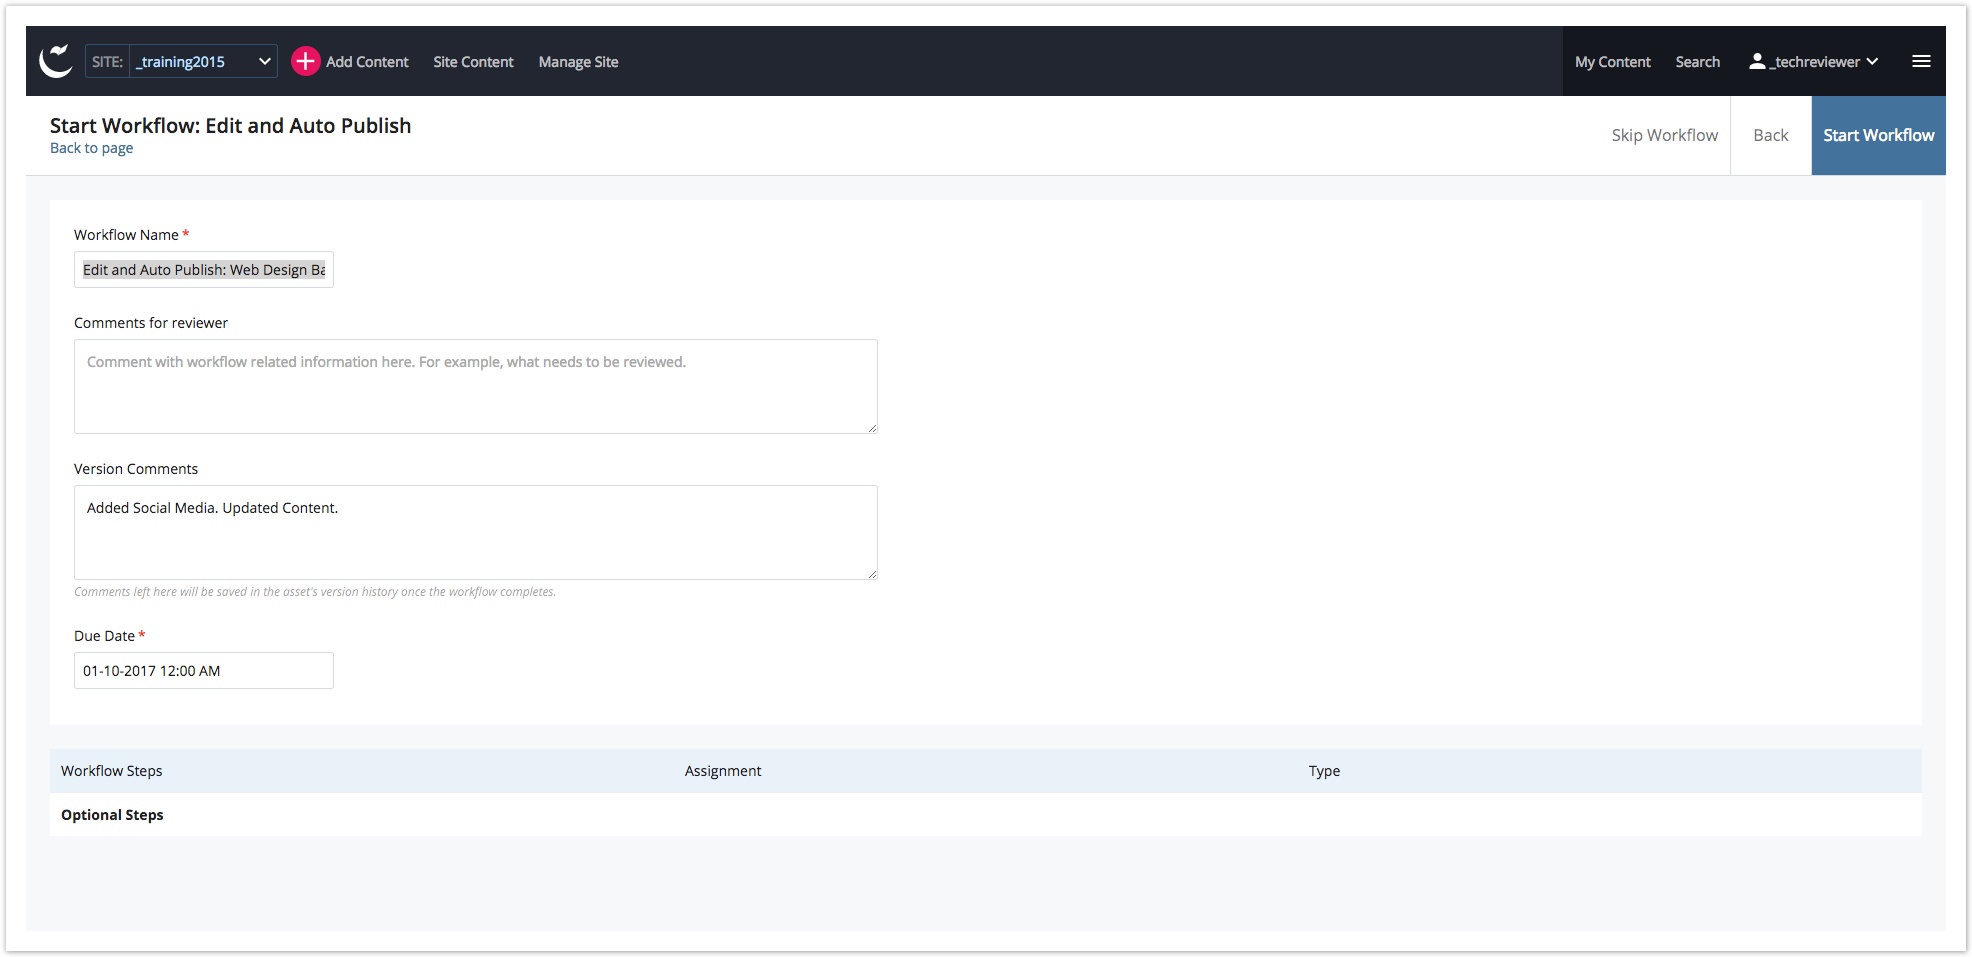
Finishing Workflow Submissions
Workflow Confirmation